Duplicate data
Understand mass duplication
You can duplicate multiple jobs and their bookings from a selected date range in the following ways:
- Duplicate both jobs and their bookings to a later date, or after a time interval
- Duplicate jobs that do not have bookings, to a later date
- Duplicate only the bookings on those jobs, on to successor jobs in the future (applicable if, for example, you import jobs from outside Retain Cloud). Also see understand next and previous jobs for more information
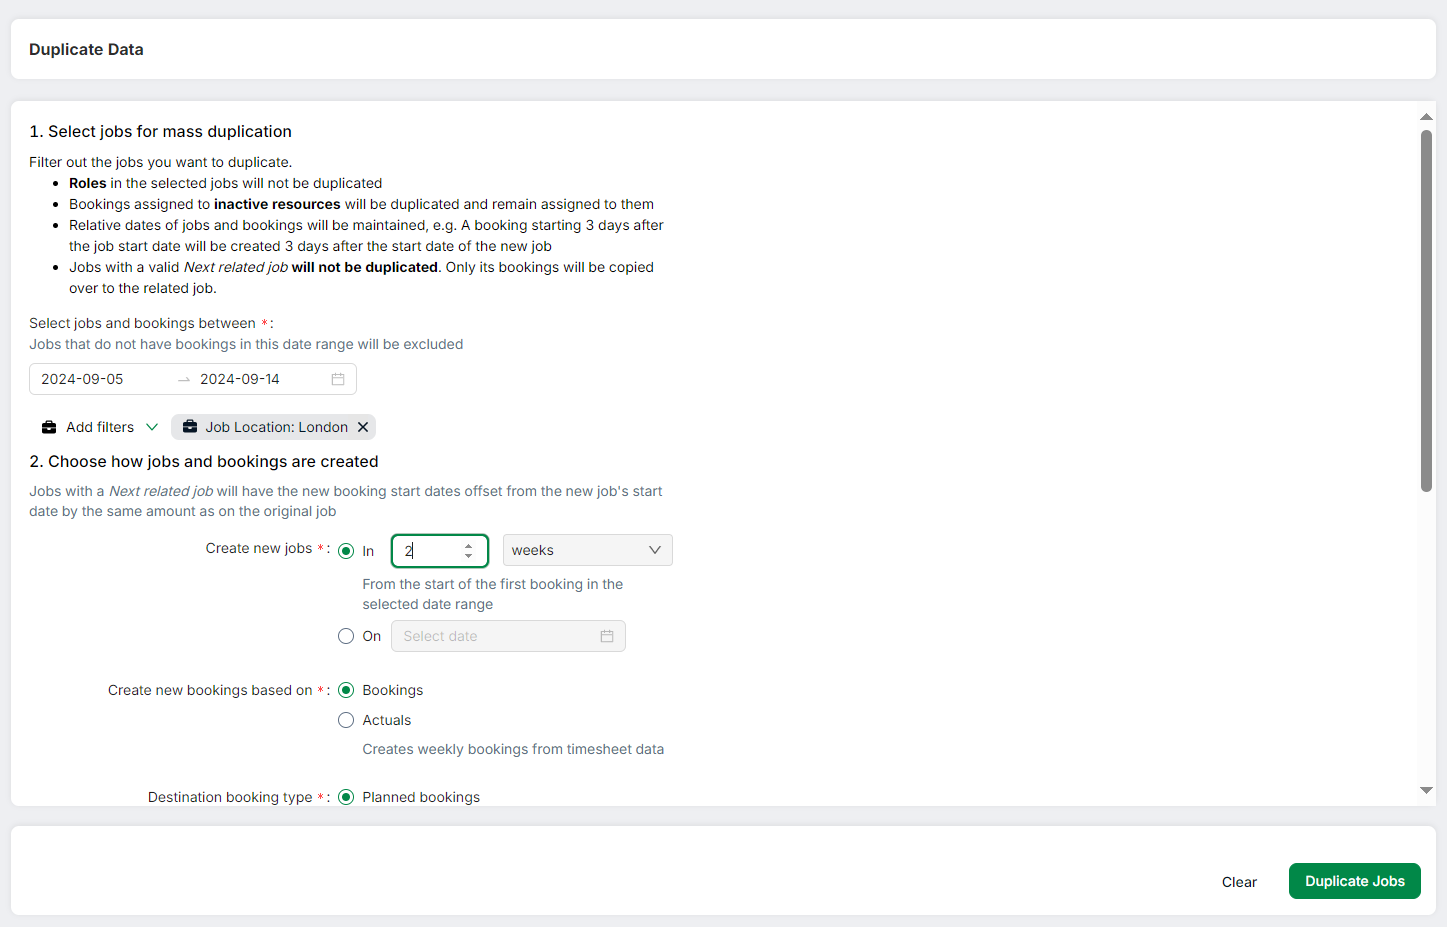
The Duplicate data page allows you to mass duplicate jobs (and their bookings) using four steps:
- Select the jobs you want to duplicate
- Choose how new jobs and bookings will be created
- Review before duplication
- Duplicate jobs in bulk
See also:
Access the Duplicate data page
Select Settings -> Duplicate data from the left menu to access this page.
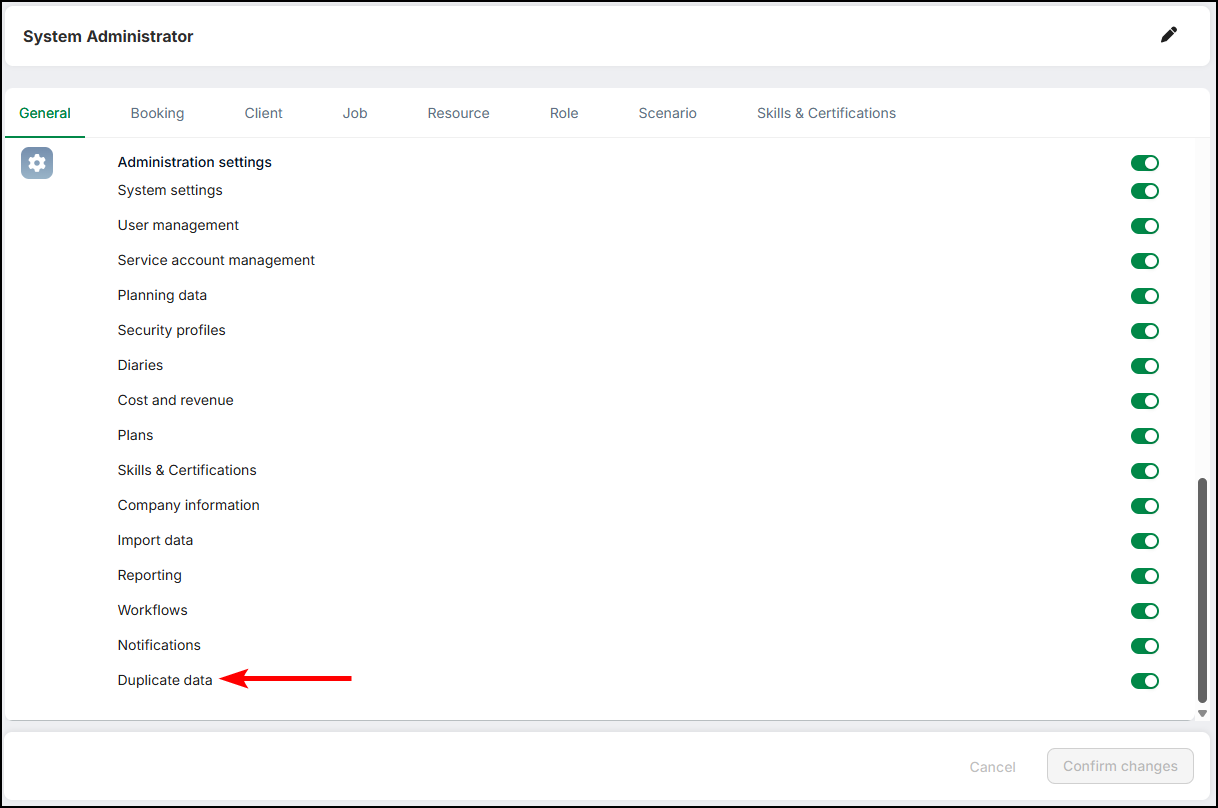
Access to the Duplicate data page is controlled via a toggle on the Administration settings section of the General tab on the Security profile. If your security profile has this toggle switched on, then you will be able to view and access this page in Administration settings.
Note
If you are not able to view a job due to security rules (and therefore have no permission to create bookings on that job), the duplicate operation may (partially) fail by skipping creation of bookings on that job. This means that the jobs will be duplicated but bookings will not be created.
Mass duplicate jobs
1. Select the jobs you want to duplicate
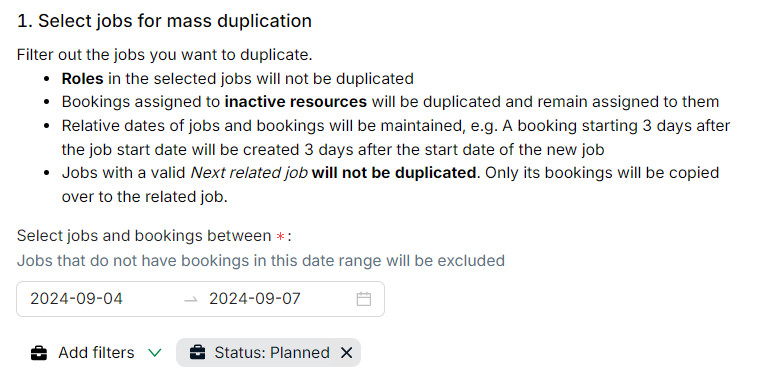
- Enter a date range (mandatory). All jobs with a start date within that date range will be selected. This includes all their bookings even if the bookings are outside the job start and end dates
- Click on the Add filters dropdown to filter the jobs. A filter must be applied. The Duplicate Jobs button will not be enabled until a filter has been applied
2. Choose how new jobs and bookings will be created
Ensure you have followed the steps in section 1 before proceeding.
Create new jobs

Select the relevant radio button and enter a value. You can either choose to create new jobs/booking after a certain number of weeks or choose to create them on a specific date. If a job does not have any bookings, only the job (with its fields) will be duplicated.
Example
If the start date of the original job is 28th August 2024 and you select In and then enter 1 week, then the start date of the new duplicated job will be 4th September 2024 (which is one week after 28th August).
Example
You select On and enter a date of 5th September 2024, then the start date of the new duplicated job will be 5th September 2024.
Example
Job "Test" has a start date of 5th September 2024 and end date of 20th September and has two bookings - one from 6th to 9th of September and the second from 16th to 17th of September.

Job "Test" is duplicated by selecting On and a date of 5th October 2024.

Then the start date of the new duplicated job "Copy of Test" will be 5th October 2024, with the first booking of this new duplicated job from 6th to 9th of October and the second booking from 16th to 17th of October 2024.

The gap between the bookings will be maintained as per the original job.
Create new bookings based on
These options allow you to select a way of creating new bookings.

- Select Bookings to create new bookings based on existing bookings (if a job has no bookings, only the job will be duplicated)
- Select Actuals to create weekly bookings from timesheet data. The total logged hours specified in the Timesheet for a resource for a week (if more than 0), are rolled forward into a new week-long booking
Example

The total hours logged for a resource for a week in the resource's timesheet is displayed above. If you select Actuals on the Duplicate data page, then the total hours logged in the resource's timesheet for a week (30 hours in this case) will be rolled forward to create one new week-long booking consisting of 30 hours.
Destination booking type
These options allow you to select the type of new bookings that are created.

- Select Planned bookings to set the status of all newly created bookings to Planned
- Select Unconfirmed bookings to set the status of all newly created bookings to Unconfirmed
- Select Keep booking status as it is to set the status of the newly created bookings to the status of the original booking. This option is disabled if you are duplicating from actuals (i.e. Actuals is selected in Create new bookings based on)
New job names
These options allow you to select a way to name the jobs which have been duplicated.
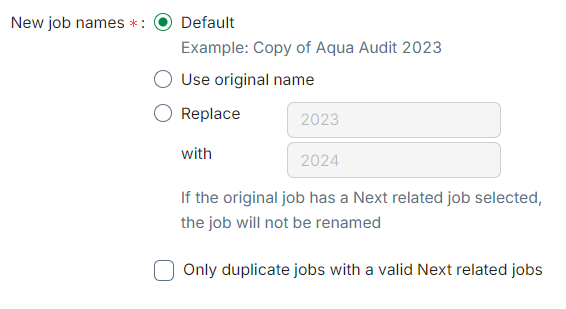
Note
If you select the Only duplicate jobs with a valid Next related job option, then the options for new jobs names (Default, Use original and Replace) are disabled. This is to ensure that clients who import jobs from outside Retain Cloud, and need it to coordinate with external systems, don't accidentally create new jobs in Retain when the intent is only to roll forward bookings.
- Select Default to add "Copy of" to the beginning of the new job name (the rest of the job name will remain the same as the original). For example, if original Job is called "Testing", the new Job will be called "Copy of Testing"
- Select Use original name to use the same name for the new job
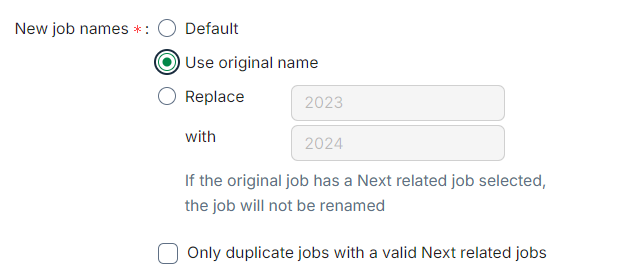
- Use the Replace option to replace a part of the original job name with a new replacement (subject to caveats as displayed on the page). If the text to replace can't be found, the default name (Copy of...) will be used
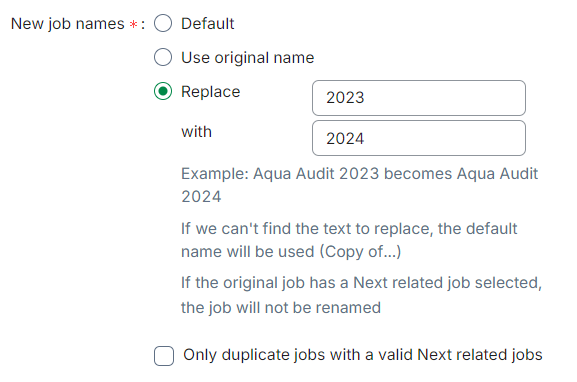
Example
If your original job name is "Audit 2023" and you select (and enter) Replace 2023 with 2024, then the name of the new job will be "Audit 2024".
If your original job name is "Audit 2023" and you select (and enter) Replace 2024 with 2025, then since 2024 will not be found (assume there are no other jobs having "2024" in their names), the new job will be named "Copy of Audit 2023".
3. Review before duplication
Ensure you have followed the steps in section 1 and section 2 before proceeding.
Click Refresh Summary to review before duplication.
A summary of the jobs queued for duplication is displayed as follows:
- Total bookings selected: the number of bookings selected for rolling forward
- Confirmed hours: the combined hours of planned bookings in the selection
- Unconfirmed hours: the combined hours of unconfirmed bookings in the selection
- New jobs will be created: the number of new jobs that will be created for jobs without a Next related job (new jobs and new bookings will be created)
- Jobs with a Next related job will only have its bookings or actuals rolled forward: the number of jobs with a Next related job (only bookings will be rolled forward into the next related job. No new jobs will be created)
Click Refresh Summary after every change you make on the Duplicate data page.
Note
The Duplicate Jobs button will not be enabled until Refresh Summary is clicked.
To review jobs before duplication:

Click on the total jobs link. A page showing the jobs details of the jobs queued for duplication is displayed.
4. Duplicate jobs in bulk
Ensure you have followed the steps in section 1 and section 2 and section 3 before proceeding.

- If you have followed all the steps showed on this page, click Duplicate jobs to start the duplication process
- The operation log is automatically displayed as follows, allowing you to view your position in the queue (if your operation is queued):
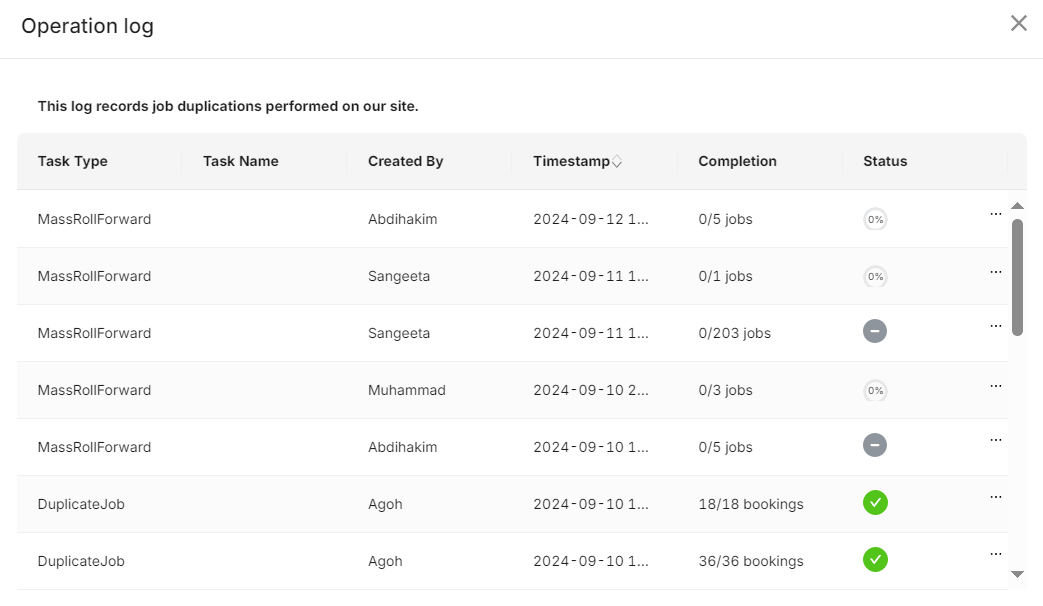
You can undo or cancel your operation by clicking the 3-dot menu in the last column. See operation log for further details
Note
Job fields on the newly created jobs will be populated with the same values as on the original job and will be left blank if the field was blank on the original job.
Job start and end dates, if present on the original job, will be offset by the same number as the newly created bookings (if bookings are copied 1 week forward, the start/end date for the new job, is also offset 1 week forward).
Limits
| Item | Limit |
|---|---|
| Duplicate jobs button | 2000 jobs with 10,000 bookings per job |
| Refresh button | approximately 2000 jobs within 20 seconds |
Reasons for failure
Mass duplication may fail due to the following:
- Exceeding the limits
- Insufficient permissions to create jobs and/or bookings
- Timeout during duplication or on clicking the Refresh Summary button
- Undoing a large operation (several jobs and/or bookings) (Note: an error may display but the Undo operation will eventually complete)
Note
If the Refresh Summary button or the duplication process keeps timing out, you may wish to split the duplication by duplicating some jobs first and others later.