Maintain resources
Search for (or filter) a Resource

Note
The list of available filter fields can be configured by an Admin user.
- Click Planner from the left navigation menu and then select the Resources tab
- If the filter pane is not visible, click Filters to display the filter pane
- Click the Resource arrow on the Filter Pane. A list will dropdown
- Select the criteria from the dropdown to search for Resources. (You can also search for a criteria by typing it in the dropdown text box and then selecting it from the dropdown). For example, if you want to search for a Resource using the Grade, then select Grade from the dropdown list and then enter a value for Grade, for example, And Grade is Junior. If you want to add another criteria, you can use the AND and/or OR logical operators, for example, And Grade is Junior AND Location is London
- Click Apply
- List of Resources matching the selected criteria is displayed
Also see filter Resources based on skills
Filter Resources based on skills
- Click Planner from the left navigation menu and then select the Resources tab
- If the filter pane is not visible, click Filters to display the filter pane
- Click the Resource arrow on the Filter Pane. A list will dropdown
- Select Skills so that the filter criteria reads "And Skills is"
- Search for a skill by entering the skill name (in part or full) in the search box of the skills filter dropdown. You can search for a skill without knowing its category
- Matching skills will be displayed in the skills dropdown, skills with levels will have a submenu
- Select a skill (selecting a skill with levels will select all levels by default)
- Click Apply
- Resources will be filtered based on the selected criteria.
Find Resources for a Job
You can quickly find Resources to view their information and fulfil staffing requirements.
Find Resources based on criteria

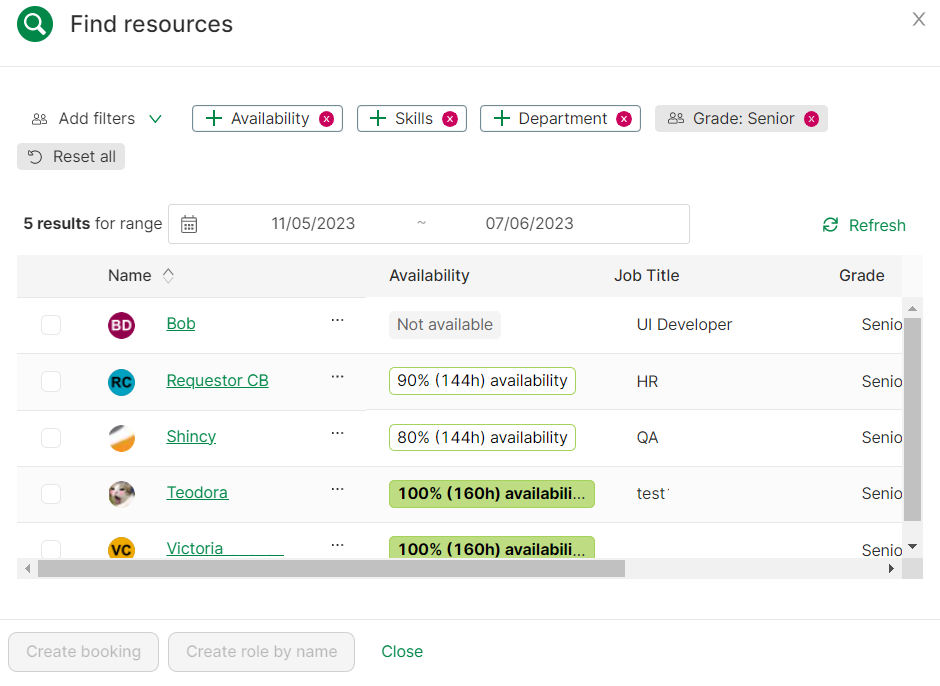
- On the planner, click Find Resources

- Select and apply the criteria to filter by clicking Add filter and/or the + for criteria listed on the top
- You can further filter by date range by selecting the dates
- List of Resources satisfying the criteria will be displayed
- Select a Resource and click Create Booking to create a Booking or Create Role by name to create a Role by name
Skill Expiry Warnings

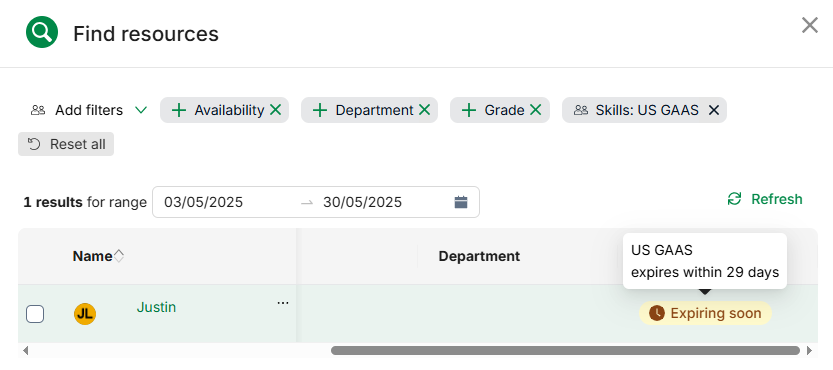
When searching for Skills or Certifications in Find Resources you are warned about any Resources who have their qualifications expiring. These warnings are shown in the Skill expiring field. Use this information to inform your team to re-certify.
View Resource availability for the current day

- Click Planner from the left navigation menu
- Select Resources
- Navigate to the specific Resource that you are interested in
- Click Today. The Jobs that the Resource is allocated to for the current day and their availability for the current day is displayed
- The visible date range will change depending on the value selected in the date dropdown
Add a Resource
Resources can only added by an user with Admin permissions. See add a new active user to add new Resources.
Edit a Resource
Edit a Resource with a click

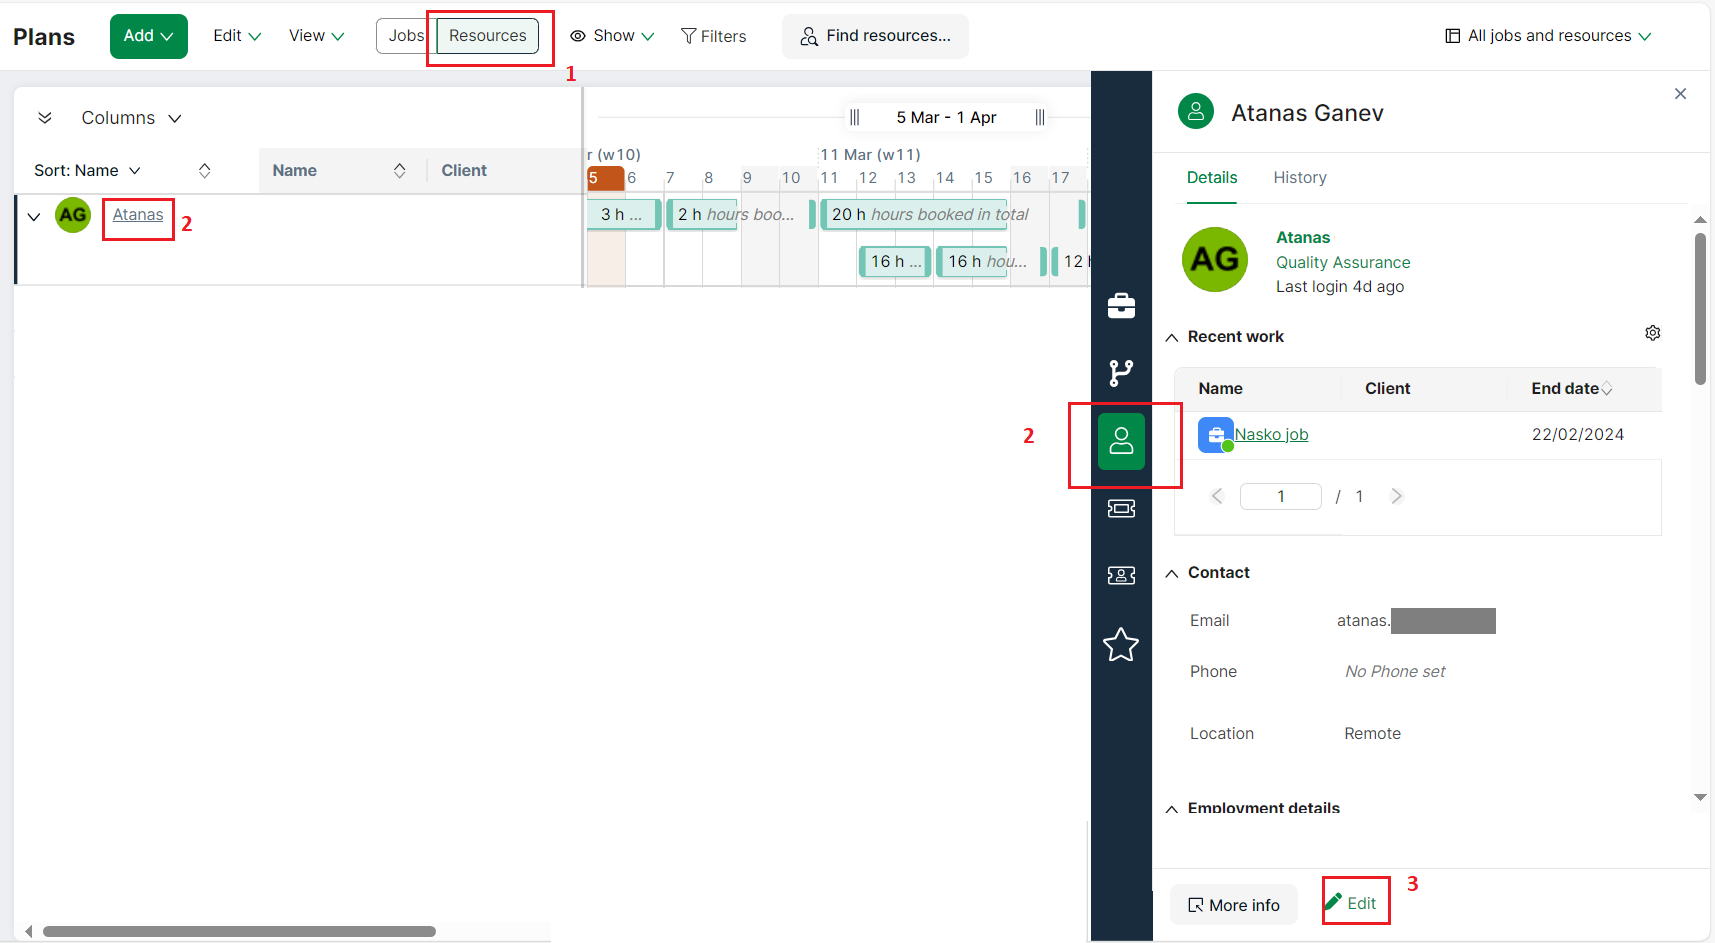
- Click Planner from the left navigation menu and then select Resources
- Click the name of the Resource that you wish to edit. A pane will be displayed
- Click Edit. A popup is displayed
- Edit the Resource details
- Save changes
Note
When editing the Resource, if the Client you are searching for does not exist, you can create a new Client by clicking on + New Client button. For example, you search for a Client called 'ABC' via Client and it does not exist, you can create a new Client called 'ABC' by clicking on + New Client.
Edit a Resource via user management
Resources can be edited via user management only by a user with Admin permissions. See edit an active user to edit Resources/active users.
Bulk edit Resources
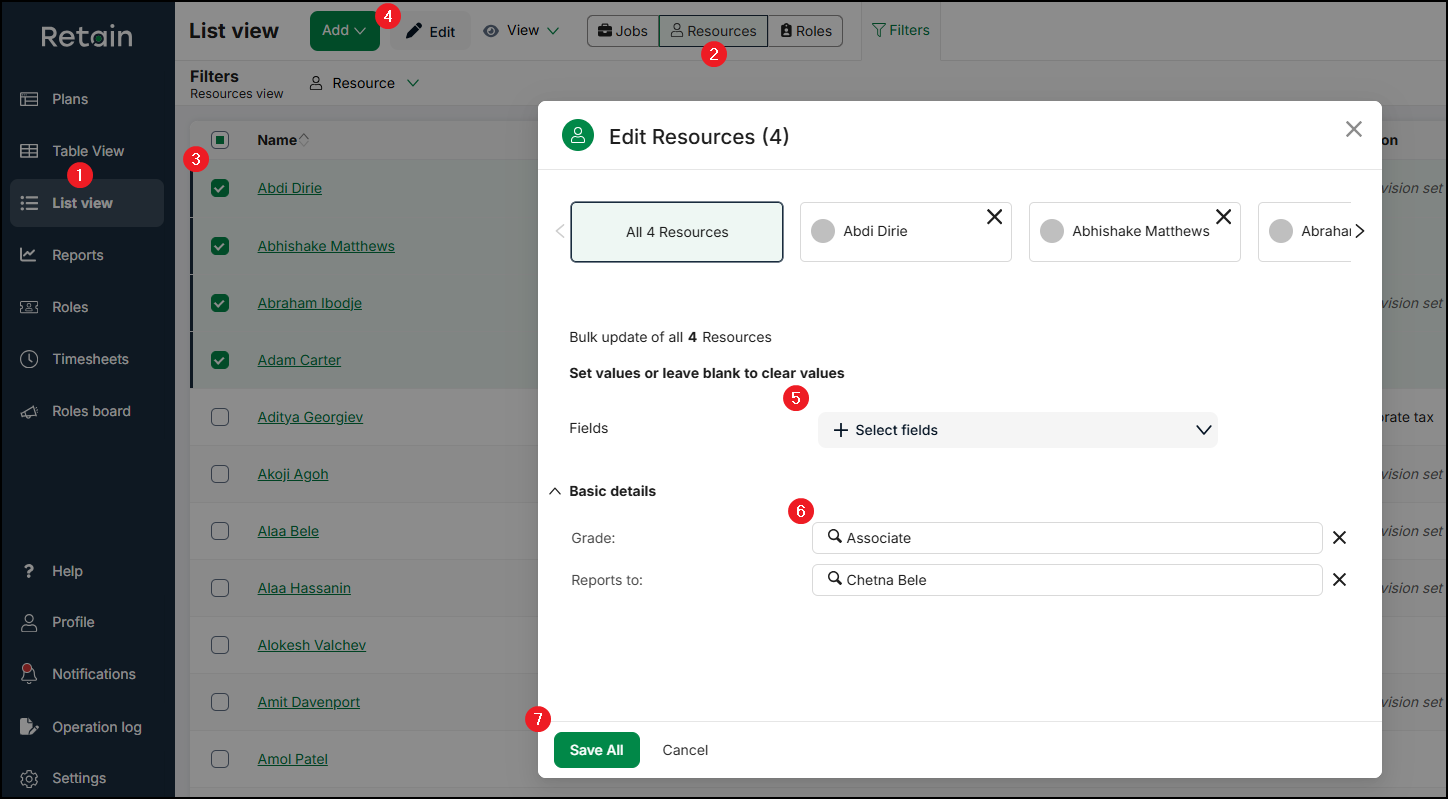
- From the navigation pane, select List view.
- From the top bar, select Resources. Retain switches to Resources view.
- Locate the Resources you want and check the boxes for each one.
- Click Edit.
The Edit Resources form opens. The top of the form displays the number of selected Resources and their names. - Select the Fields you want to edit.
- For each field, select the new value you want.
- Click Save all.
Retain updates the data for all of the selected Resources.

Note
- You cannot edit a Resource's Skills using this process.
- The maximum number of Resources you can bulk edit at once is the number of visible Resources on the grid. Use the pagination options to change the number of visible Resources on the grid.
- You must have permission to edit Resources individually to be able to edit them in bulk.
Attach documents
Documents can be attached to a Resource when editing the Resource and also via their Talent Profile. See Upload and Attach documents for more detail on uploading and attaching documents.