User Management

Understand Active and Inactive users
Your licence will allow a maximum number of Active users.
Users correspond to the resources you will be planning for in Retain.
Resources can be made Inactive if you no longer need to plan their time e.g. an employee retires or leaves.
When a resource is made inactive:
- They cannot be searched, filtered on, or assigned to bookings
- They cannot log into their accounts
- Bookings they were assigned to in the past are preserved for reporting functionality
- Current and future bookings become unassigned
- Their diary is set to No Diary
If you require more Active users than your license allows, you can either:
- Deactivate some existing users to make way for new ones or
- Contact us about purchasing a license that allows additional active users
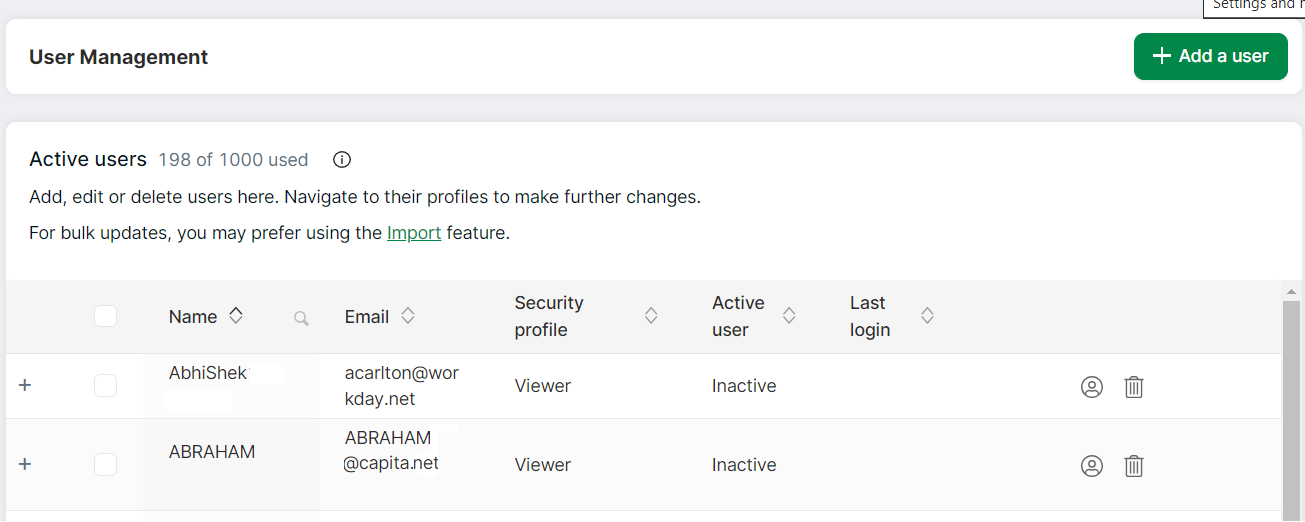
The current total and maximum total of used active users is displayed on the page.
Change the user status to Active/Inactive

- Click Settings on the left navigation bar
- Select User Management
- Select one or more users by clicking on the adjacent checkboxes. An Actions menu will be visible on the top next to Add a user
- Click the arrow to drop down the Actions menu
- Select Active user -> Set to Active or Active user -> Set to Inactive to change the status of the selected users
Note
If you select more users than your licence permits, the Set to Active option will be disabled.
User status can also be changed by editing users.
Add Users
- Click Settings → User Management on the left navigation menu bar
- Click Add a user. A section will be displayed where you can add the user details
- Add the user details (all required):
First name+Last nameEmailNote: users that need to login must be invited after they have been addedSecurity profile: defines what functionality and data the user can access in their security profileActive user: new users are Active by default
- Save changes
Edit Users
- Click Settings on the left navigation bar
- Select User Management
- Click on the row of the user that you wish to edit. The row expands to display further details
- Modify the user details
- Click Save changes
To modify further specific resource details, view their profile or see editing resources
Delete users
Note
You may delete resources and users by following the steps shown below.

- Click Settings on the left navigation bar
- Select User Management
- Click the Delete icon against the row of the user you wish to delete
- The user is marked for deletion
- Click Save Changes
- A warning message is displayed
- If you are happy to proceed, confirm the deletion
View the profile of a user

- Click Settings on the left navigation bar
- Select User Management
- Click the icon to view the profile of the selected user
Invite Users by Email
SSO users cannot be invited to create a password/login. This section is not applicable to SSO users.
Users must be invited in order to create a password and login themself.
Invited users they will receive a sign-up link via email that will expire after 30 days.
To invite a user:

- Click Settings on the left navigation bar
- Select User Management
- Locate the user you want to resend the email to, then click the icon to resend the email invite
Note
- The icon to send an email is hidden for inactive users
Invite users to complete a C-me survey

- Click Settings on the left navigation bar
- Select User Management
- Locate and select the user you want to invite. An Actions dropdown will be enabled
- Select Send C-me survey
The selected user will be sent an email invitation to complete their C-me survey.
Reset the password of a user
SSO users cannot reset passwords. This section is not applicable to SSO users.

Note
The icon to reset a password is hidden for inactive users.
- Click Settings on the left navigation bar
- Select User Management
- Click on the row of the relevant user
- Click the icon to reset the user's password