Manage booking bars
Control the amount of information displayed
You can control the amount of information that is displayed on the booking bar.
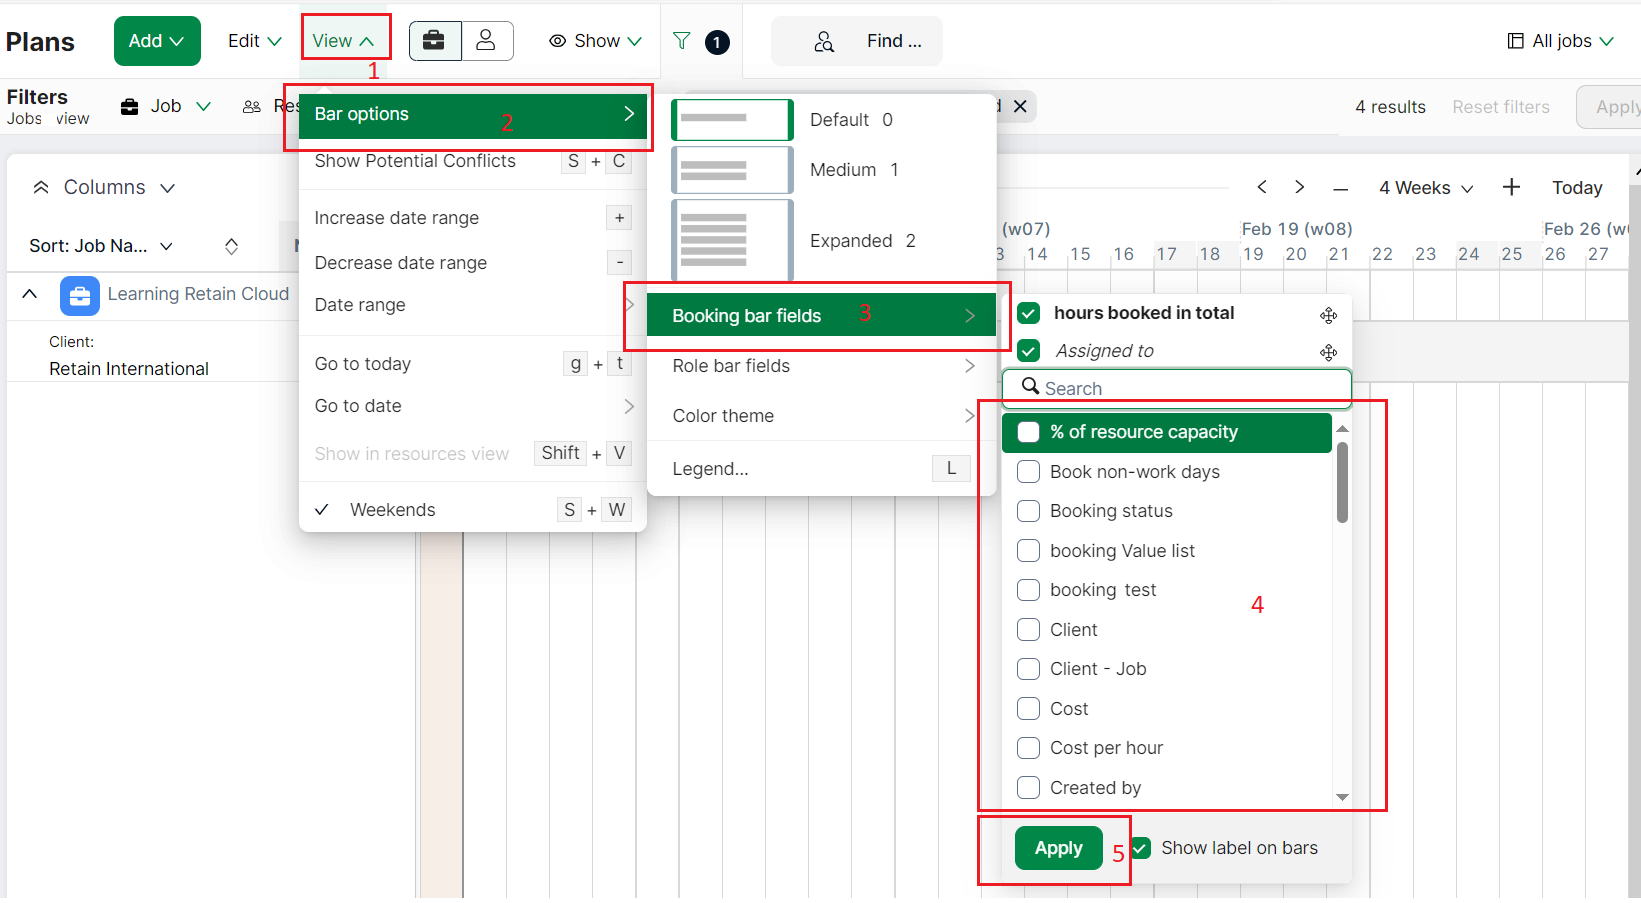
- Select Planner from the left navigation bar
- Select View → Bar options from the top menu
- Select the display size:
- Default displays up to 1 field
- Medium displays up to 2 fields
- Expanded displays up to 5 fields
Select the fields that are displayed
You may select role as well as booking fields. To select fields that are displayed on the booking bar:

- Select Planner from the left navigation menu and then select View → Bar options from the top menu
- Select Booking Bar Fields or Role bar fields
- Select the fields by putting a checkmark against the field. The number of fields that can be selected will depend on the selected booking bar size. Selected fields are displayed at the top of the field picker and are visible on the booking bar. The Apply button will be enabled after you select a field
- Click Apply. The selected fields will be displayed in the booking bar. Fields will be formatted, for example with a currency or a percentage symbol, according to their field type
Show/Hide labels on bars

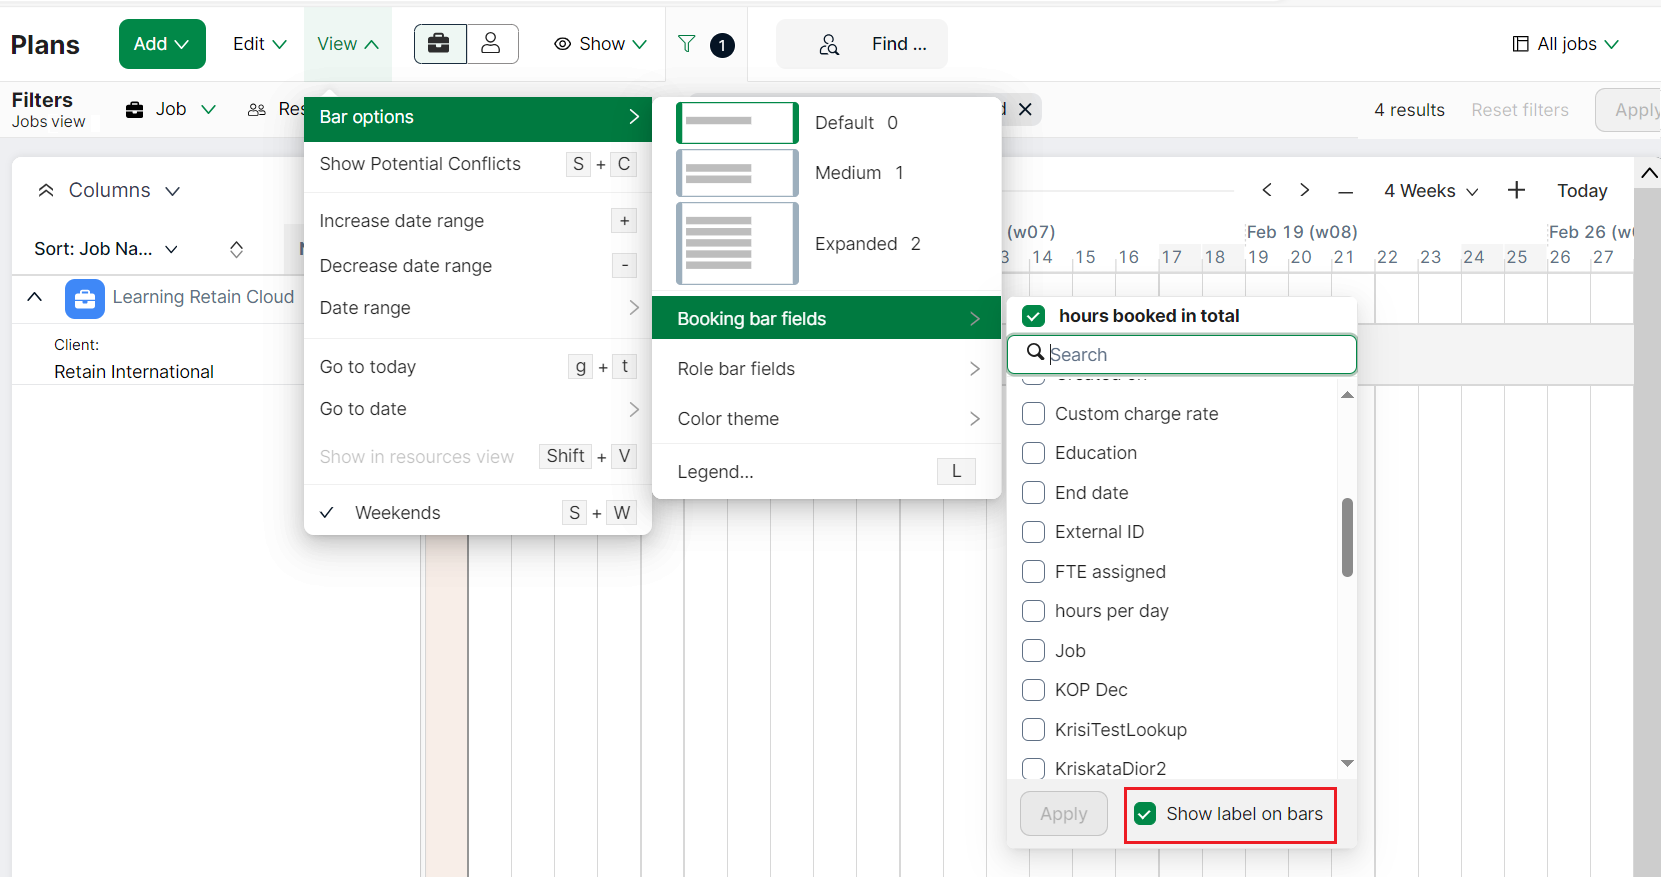
- Select Planner from the left navigation menu and then select View → Bar options from the top menu
- Select Booking Bar Fields or Role bar fields
- Toggle Show label on bars on/off to display/hide labels on bars
Note
Units (e.g. £, h, %) will still be displayed on the bars even of you hide the labels.
Reorder information displayed

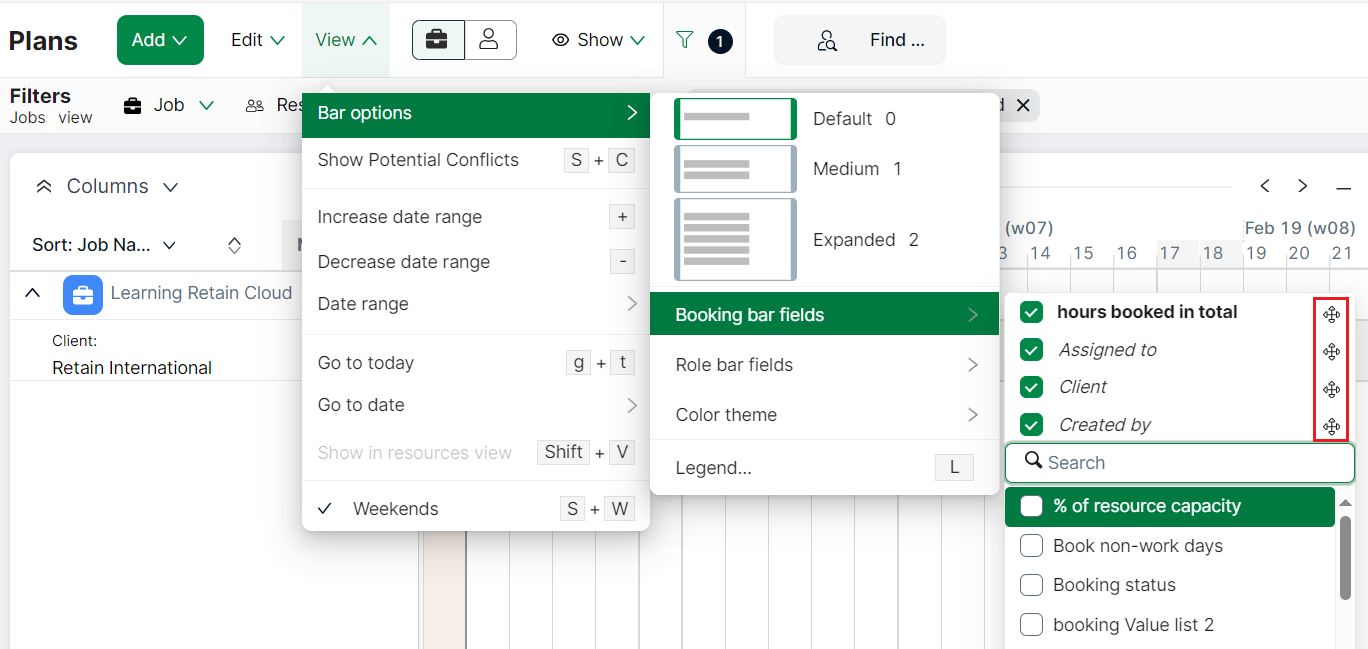
- Select the fields that are displayed on the booking bar
- Click on the icon against a field (shown highlighted in the screenshot) and drag it above or below the other fields to reorder
- Reordered fields are reflected in the booking bar
Apply a colour theme to values of a selected field
Different values of a selected field can be displayed in different colours based on a colour theme. You can select a colour to automatically generate a colour theme which can then be saved to your plan.
You can apply a colour theme to your bookings/roles by choosing one of the following:
- the default colour theme (this is the colour theme that has been created by the system)
- the colour theme created by Admins
- your own custom colour theme for bookings and roles
This range of options gives resource managers more control without having to depend on Admins for creating colour themes. You can switch between the default, admin and custom colour themes.
To select a custom colour theme:
- Select View → Bar options → Colour theme from the top menu
- A sub-menu will display all the available colour themes. The current, active colour theme is indicated by a checkmark
- Select Custom booking colour theme for bookings and/or Custom role colour theme for roles and then select the field you wish to apply the theme to. You can apply colour themes to either bookings or roles or both together. Note: Ungrouped roles will not be available as a field for colour themes
- The selected colour theme will be applied to the values of the selected field
- The colour theme will also show up in the legend. To view the Legend, select View → Bar options → Legend
Note
The colour theme is generated for the selected field using the existing colour palette which is available under **Settings → Plans → Colour themes. Some colours may be repeated if there are too many field values.