Progress roles
Define actor actions
See workflows to define the actions that each actor can take in the Role workflow.
Archive a Role
There are five ways to archive a Role:
- Select a Role on the Planner/Role inbox and click Edit → Archive from the top command-bar menu
- Right-click a Role on the Planner and select Archive
- Click Actions → Archive on the Role details pane
- Select a Role on the Role inbox and select Archive from the 3-dot menu
- Click the 3-dot menu on a Role on the Scenario details page and select Archive
- Choose one of the methods
- The Archive button will now change to Restart
Move a Role
A Role can be moved to a different Scenario and/or Job. There are four ways to move Roles:
- Edit or bulk edit a Role and change the Scenario
- Drag the Role bar in the Planner. See details below
- Action a Role. See details below
Drag the Role in the Planner
- Drag and drop a draft Role on the planner
- A dialog will display the Job you're moving into and a Scenario field which will be blank
- Change the Job and/or Scenario. Leaving the Scenario blank will create an ungrouped Role
- Click Move to move the Role to the selected Job/scenario
Note
The Move dialog will not appear in the following role by name cases:
- when moving within the same Resource record which is collapsed (Resources view)
- when moving to another Resource record which is expanded, and the Job is the same (Resources view)
- when moving within the Job record which is collapsed (Jobs view)
- when moving within the Job record which is expanded (Jobs view)
For criteria Roles:
- Drag and drop criteria Role bars to a different Job parent or child row to change the Job
- Drag and drop criteria Role bars within the same child or flattened parent row to change the dates required
- You will not be able to drag criteria Role bars to a different Resource parent or child row to change the assignment of the Resource - this includes the Unassigned Resource row. Assigning a Resource to a criteria Role can only be done via the Suggestions pane
Move/Remove pending FTEs or pending Resources from a Role
When a Requested criteria Role has unfilled allocation remaining, you have the option to either move the pending allocation to a new Role or remove the pending allocation. You will be able to choose Move pending FTEs/resources and Remove pending FTEs/resources from the Action menu once an assigned Resource is made Live on a criteria Role.
Move pending FTEs/resources -> Any pending FTEs/resources requested will be moved to a new Draft Role, and the original Role will be set to Live. Assignees who are Requested will be unassigned.
Remove pending FTEs/resources -> Any pending FTEs/resources requested will be removed, and the original Role will be set to Live. Assignees who are Requested will be unassigned.
A Requester will see the option to Move pending FTEs/resources on a Role they created. The Assigner or Approver for that Role will also be able to see this option if they have permission to create criteria Roles, i.e. if they meet the condition to create the new Role.
Remove pending FTEs/resources is visible to all actors for a given Role. This allows a requester to say they no longer need the remaining allocation, or for the assigner/approver to close a Role that can't be fully staffed.
Select the Role with pending FTEs and select the action you want from the Actions menu.
Action a Role
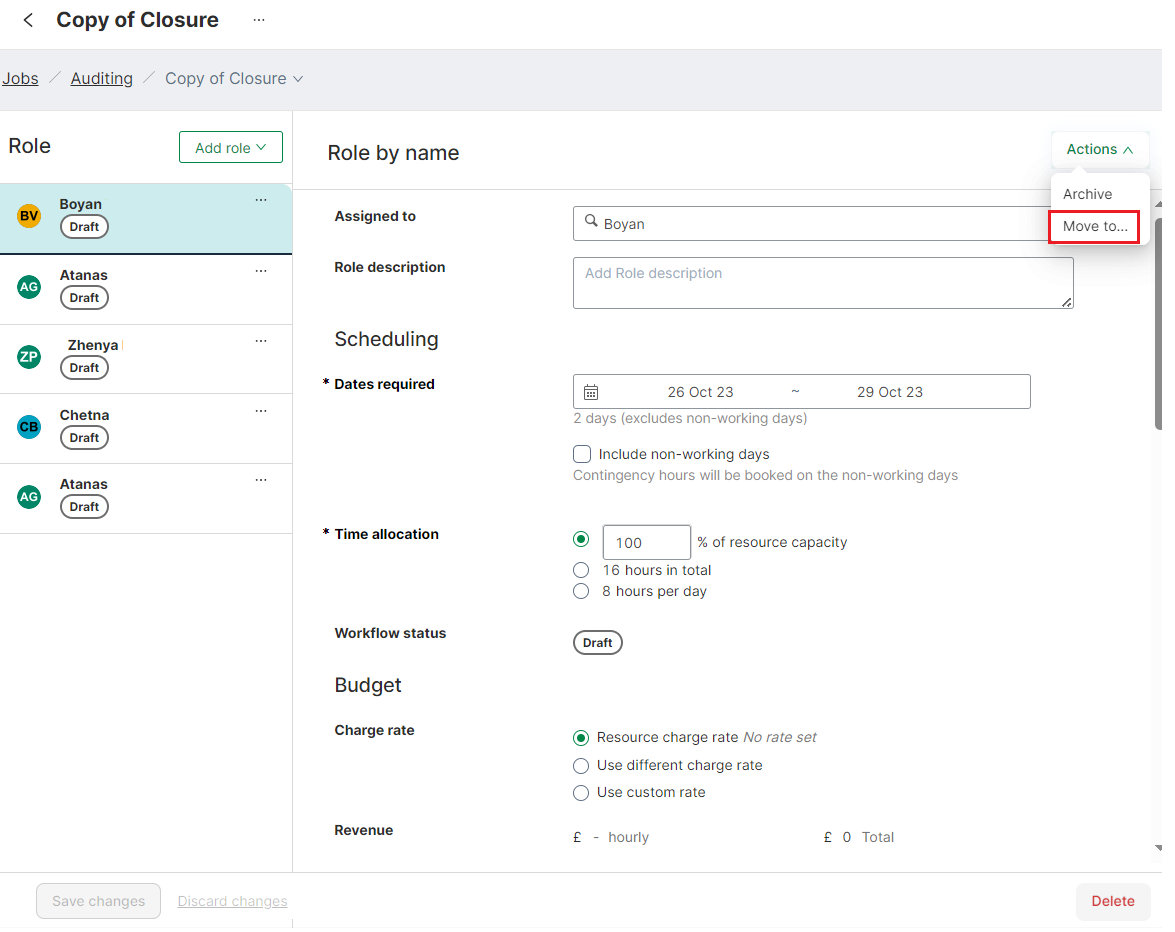
- View Roles via the List view page
- Click Actions → Move on the Role details pane
- A dialog will display the Job you're moving from and a Scenario field which will be blank
- Change the Job and/or Scenario. Leaving the Scenario field blank will create an ungrouped Role
- Click Move to the selected Job/scenario
Duplicate a Role
Roles of any status can be duplicated. When you duplicate a non-Draft Role, the status of the duplicated Role is set to Draft. When you duplicate a criteria Role, shortlisted Resources are not copied across. Live, Archived and Rejected Roles cannot be duplicated via the Planner.
Roles can be duplicated via:
- The Scenarios page
- The Roles inbox
- Criteria Roles can be copied/pasted via the planner
- The List view page
From the Roles inbox

- Select Roles from the left navigation menu
- Select a Role to duplicate
- Click the 3-dot menu for a Role and select Duplicate
- The Role is duplicated. A Role created message is displayed. Focus will shift to the new Role
Note
The following will not be duplicated:
- When the assigned Resources are Inactive
- System-readonly fields and calc-fields as the values will be automatically derived
In addition, for criteria Roles, the following will not be duplicated:
- Assigned Resources
- Hidden field values
- Role status
From the List view page
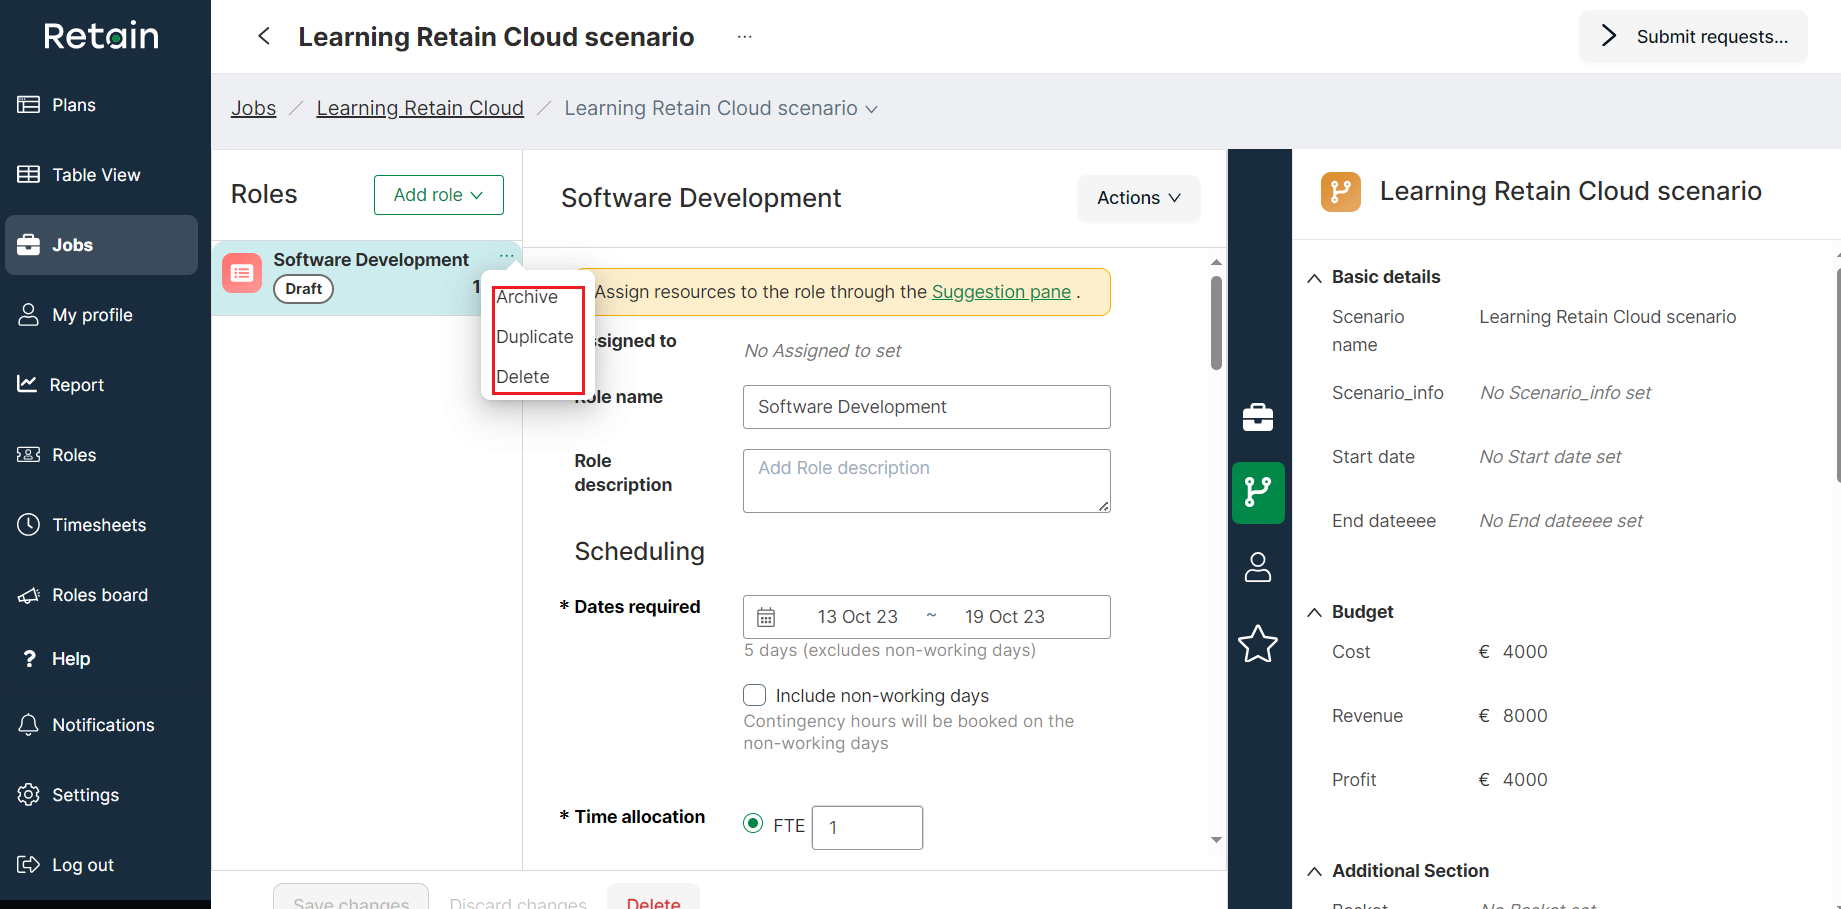
- View Roles in a Scenario
- Click the 3-dot menu for the Role that you wish to duplicate
- Click Duplicate
- New Role will be set to Draft
Reject a Role
There are five ways to reject a Role:
- Select a Role and click Edit → Reject from the top menu (disabled if multiple requests are selected)
- Select a Role bar and and click Reject from the 3-dot menu
- Select a Role and click Actions → Reject on the Role pane
- Reject Roles in bulk (not applicable for Roles by requirement)
- Click Roles from the left navigation menu, click the 3-dot menu for the Role you wish to reject and then select Reject from the menu
Choose one of the methods above.
- On the next page, select the reason for rejection and write a note, if any
- Click Reject Request
Note
You can only reject Roles one by one. You can only reject Roles with active Resources assigned.
Restart a Role
There are three ways to restart an archived Role:
- Select a Role and click Edit → Restart from the top menu
- Click the 3-dot menu for the Role you wish to restart on the Roles page and select Restart
- Click Actions → Restart on the Role pane
Submit a request
There are six ways to request a Role for a Booking:
- Add a Role and click Submit request. You require an active Resource assigned before you can submit a Booking
- Select a Role and click Edit → Submit request (only enabled when Role has an active Resource assigned)
- Select a Role, right-click and then select Submit request (only enabled when Role has an active Resource assigned)
- View a Role on the Role pane, select Actions → Submit request
- By submitting Bookings for multiple Roles in bulk
- Click Roles from the left navigation menu, click the 3-dot menu for the Role for which you wish to request Booking and then select Submit request
After choosing one of the options above, select the Roles you wish to request on the Submit request page and click Submit.
Note
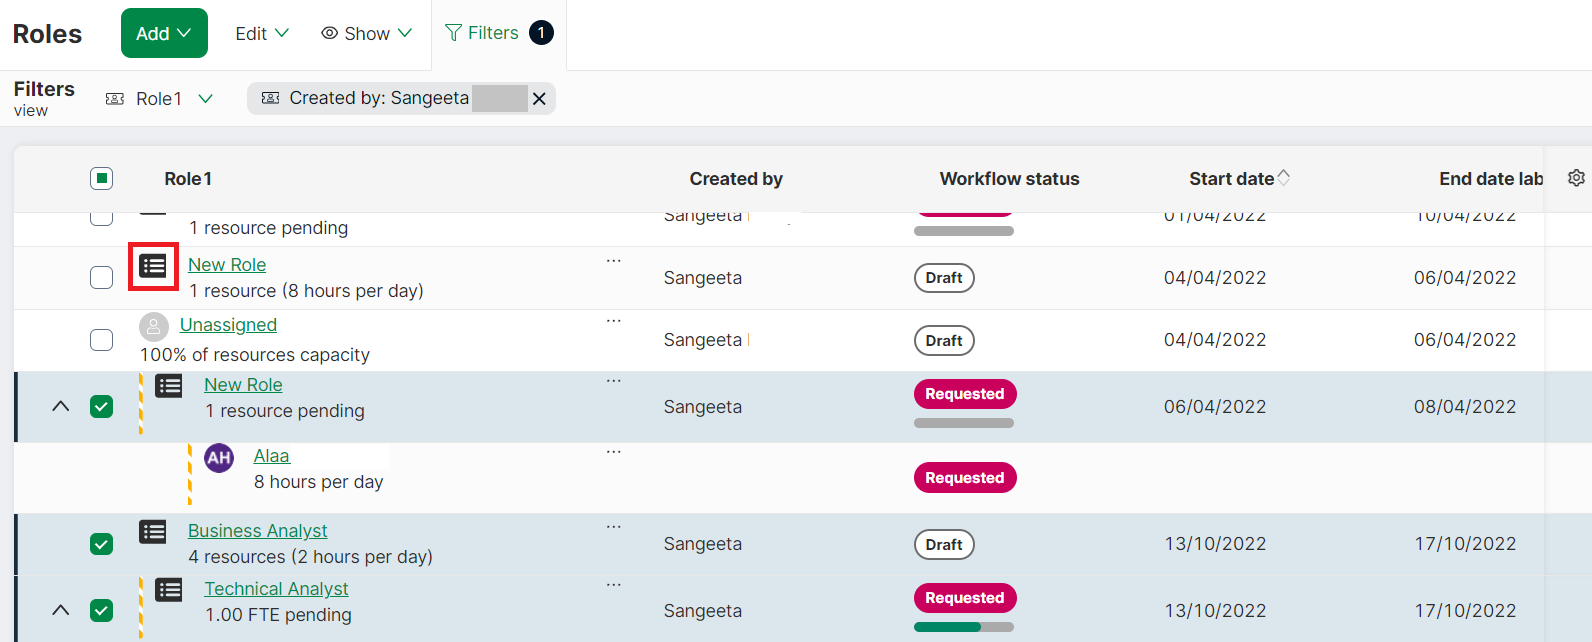
- The unassigned Role by requirements are displayed with the Role name and Role by requirements icon in the Role column, e.g. Software
- The budget info (Cost, Revenue, Profit) for unassigned Role by requirements will always be '-'
- Inactive Resources will not be shown
Create a live Booking from a draft Role
You can directly create a Booking from a draft Role if you have the permissions. There are four ways to create a live Booking from a draft Role:
- Select a Role on the Planner and click Edit → Make live from the command bar menu
- Right-click a Role on the Planner and select Make live
- Click Actions → Make live on the Role pane
- By creating live Bookings for multiple Roles in bulk
- Click Roles from the left navigation menu, click the 3-dot menu for a Role and select Make live
Choose one of the methods above.
- On the Create Booking screen, select the Roles you wish to complete and click Submit
- Bookings will be created for the selected Roles
Note
- When an assigned Resource is progressed to Live, the role status for that Resource becomes Live and the summary Request status of the Role also becomes Live
- Once a criteria Role is Live, you will not be able to unassign the assigned Resource from Role
Create a Booking
See understand Roles to understand the progression of Roles.
- View Roles. A screen showing a list of Roles (excluding live, archived and Roles with inactive Resources) belonging to the Scenario is displayed
- Depending on your permissions, Submit Booking and/or Make live buttons will be enabled. Make live will allow you to progress the Draft Role to Live. Submit Booking will allow you to request a Booking
- Click Make live
- On the next screen, select the Roles you wish to create by selecting the checkbox
- Click Submit
- If your Role is outside the Job date range, you will be given the option to extend the Job period to allow the Role to be scheduled.
Note
- For Role by requirements, the Role name is displayed above the Resource name in the Role column
- Inactive Resources are not displayed
Edit/Delete/Archive/Request/Reject Roles in bulk
Bulk actions can be performed on Roles:
Note
- You cannot bulk reject, as a reason is needed for each rejection
- You cannot progress Inactive Resources
- Live Roles cannot be progressed
- if you select multiple non-criteria Roles, and there is one rejection, you can reject by selecting Edit -> Reject from the top menu
- You cannot reject a single non-criteria Roles having Requested status
- You cannot reject multiple non-criteria Roles having Requested status
On the Roles inbox
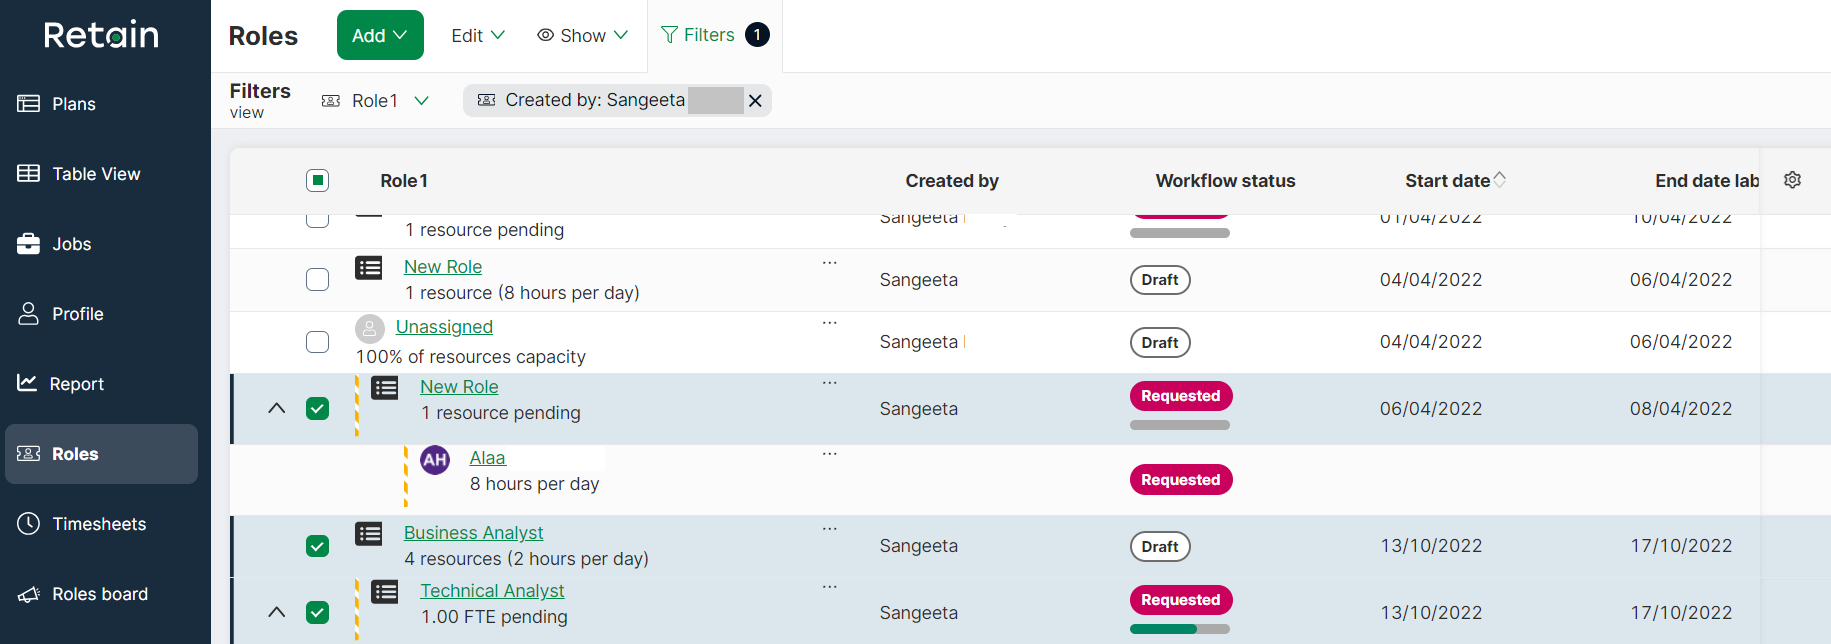
- Select Roles by clicking on the respective checkboxes. You may select a mix of criteria Roles and non-criteria Roles
- Click Edit on the top menu
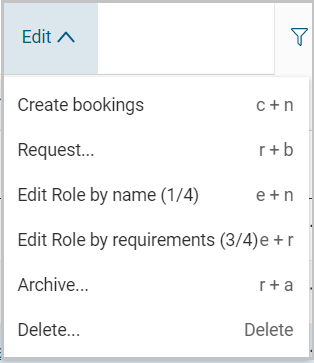
- Select Edit Role by name if you want to edit non-criteria Roles
- Select Edit Role by requirements if you want to edit criteria Roles. The numbers in the brackets indicate the type of each Role selected. Note: You cannot view suggestions for multiple criteria Roles
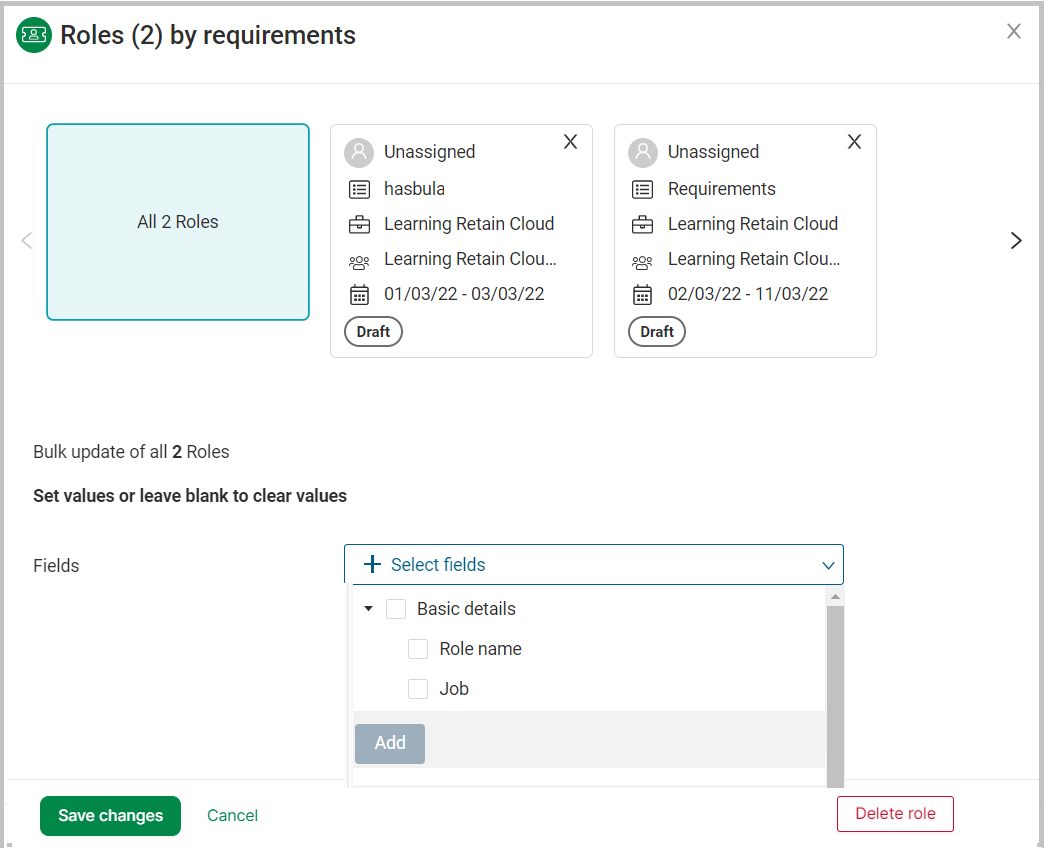
- Select the fields that you wish to edit by clicking +Select Fields and then select specific fields by clicking the adjacent checkboxes. Click Add
- You may choose to individually edit Roles by selecting the respective Role cards displayed on the top, and then edit the fields. The selected card is highlighted
- If there is an error then the respective card is highlighted to let you know the erroneous Roles
- Click Save changes to save
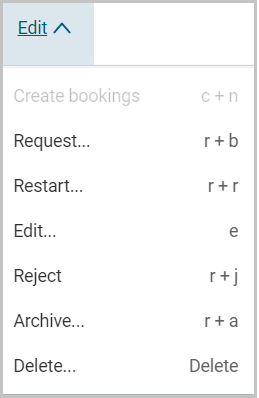
- To progress a Role, select the relevant action from the Edit menu. Actions as per the defined progression can be performed
On the Role pane
See here for ways to access the Role pane.
- Select Roles by clicking on the respective checkboxes. You may select a mix of criteria Roles and non-criteria Roles
- Click on a Role to display the Role pane
- To bulk edit or bulk progress Roles, select the relevant action from the Action menu. Actions as per the defined progression can be performed
- Select the fields that you wish to edit by clicking +Select Fields and then select specific fields by clicking the adjacent checkboxes. Click Add
- You may choose to individually edit Roles by selecting the respective Role cards and then editing the fields. The selected Role card is highlighted
- If there is an error, the respective card is highlighted to let you know the erroneous Role
- Click Save changes to save
On the Planner
- To select multiple Roles, select a Booking or a Role bar from the Planner, press the Ctrl key and click on one or more Role bars. Only the Role bars that are in the visible area can be selected
- To edit in bulk, you may also drag the Role bars to change dates or resize the Role bars to extend the start/end dates
- A section displaying Edit All, Delete All, Archive All, Request All links will be displayed
- Choose an option
- A form showing all your selected Roles is displayed as shown in the screen above. You can now perform your chosen action in bulk on this form. The total number of selected Roles will be displayed as Roles (n) on the top of the form
- For example, to bulk edit all the selected Roles, ensure that the All n Roles card is selected and proceed to edit the selected fields
- Select the fields that you wish to edit by clicking +Select Fields and then select specific fields by clicking the adjacent checkboxes. Click Add
- You may choose to individually edit Roles by selecting the respective Roles tab and then editing the fields. The selected tab is highlighted
- If there is an error then the respective tab is highlighted to let you know the erroneous Roles
- Click Save changes to save
Publish a criteria Role to the Roles board
Criteria Roles may be published to the Roles board, allowing professionals to view and apply to the Roles they are interested in. The Publish option is only displayed for a selected criteria Role in requested state which is not yet fully staffed. The keyboard shortcut is p + r. Only one requested criteria Role can be published at a time.
To publish a Role to the Roles board from the Roles page:
- Select a Role and then select Publish to Roles board from the Edit top menu (or from the 3-dot menu or Actions menu from the Details pane)
- A pop-up will display
- Enter the role category in the pop-up
- Enter the publish date
- If you want to allow only applicants who match the Role criteria to apply, select yes for criteria match
- Select Publish Role. The Role gets published to the Roles board
You will be able to edit the publication details of the Role by selecting one of the options detailed in point no 1 above or by using the keyboard shortcut e + p.
To remove a published Role from the from Roles board page, select a Role and then select Remove Role publication from the Edit top menu (or from the 3-dot menu or Actions menu from the Details pane).