Logic Apps Examples
Ensure you have completed the initial set up of your environment before trying these examples.
Note
The initial set up should be performed only once per resource group/subscription to avoid duplicates.
Two types of examples have been provided:
- Create Logic Apps using different connectors:
- Create Logic Apps by using Retain templates:
Create a Logic App resource
- Sign in to your Azure portal with your Azure account
-
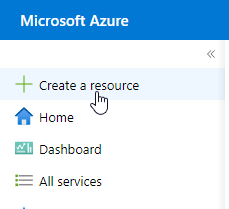
Click Create a resource
-
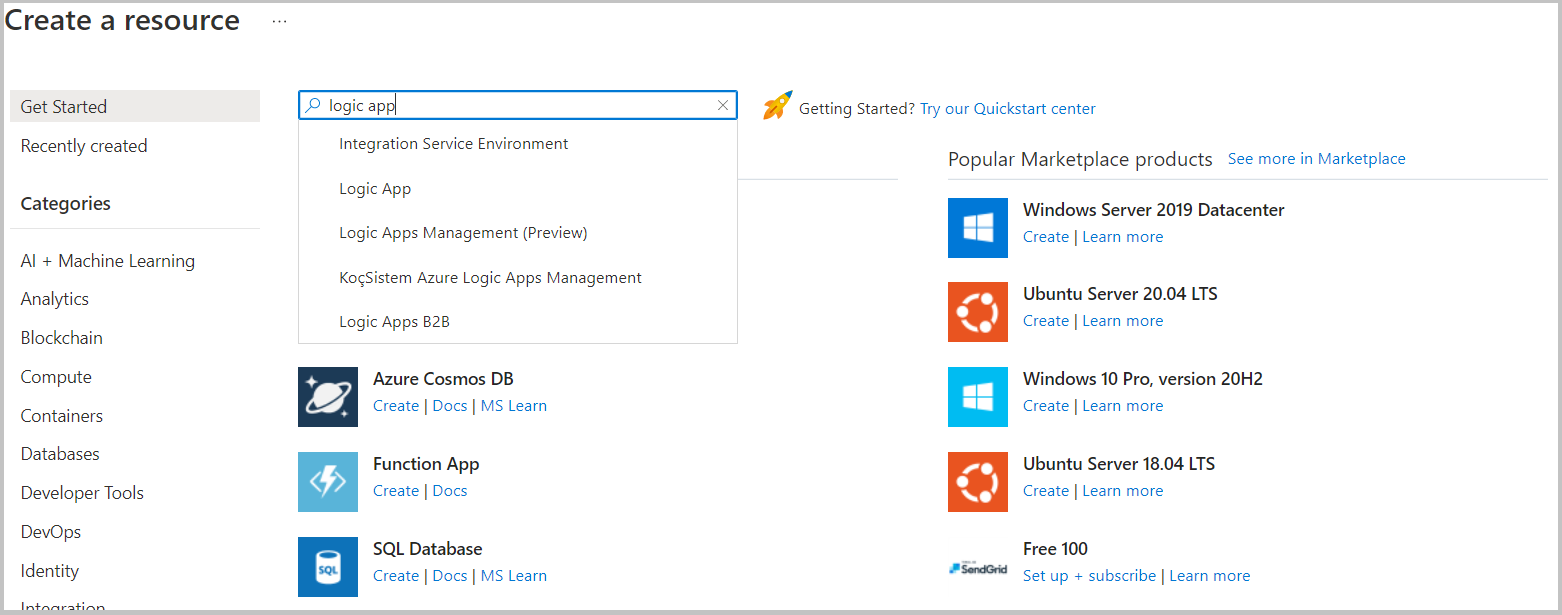
Enter Logic App in the search box and then select Logic apps
-
Click Create on the logic apps page
-
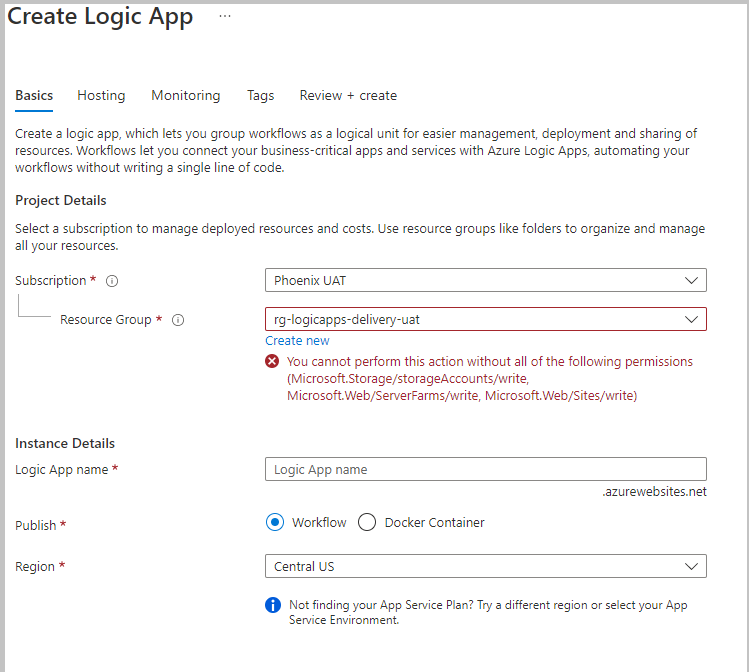
Select your Azure subscription name and Resource Group. You create your logic app and related resources in the Azure resource group. This name must be unique across regions and can contain only letters, numbers, hyphens (-), underscores (_), parentheses (()), and periods (.)
- Enter a name for your Logic App. This must be unique across regions and can contain only letters, numbers, hyphens (-), underscores (_), parentheses ((, )), and periods (.)
- Select the Region. This is the Azure datacenter region for storing your app's information
- Select Consumption as your Plan type. Plan type property specifies the logic app type and billing model to use
- Zone redundancy section appears after selecting Plan type. Select Enabled. To read more, see set up zone redundancy
- For a quick start, set Enable log analytics to No
- Click Review and Create and then click Create on the validation page
- You will get a message Deployment succeeded and an option Go to resources on the top right corner
After this point, you can proceed to create a resource.
Query specific fields of the Job table by using Retain API
This example queries the following fields from the Job table: job_guid, job_description, job_code, job_start and job_end. It uses the query one or more tables api in order to do this.
The following screenshot shows the high-level example workflow:
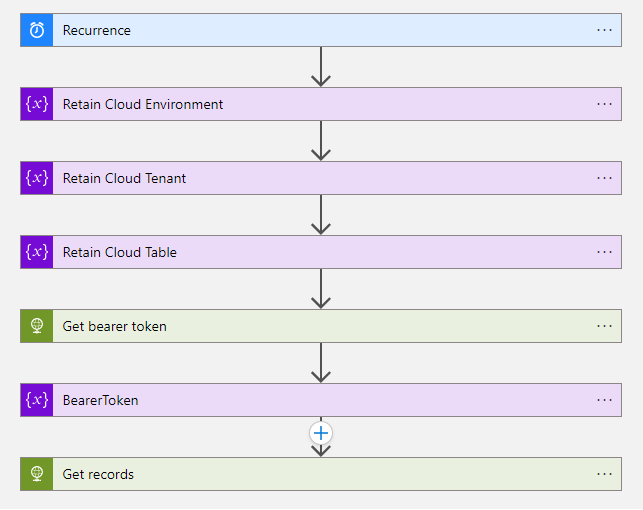
After setting a recurrence trigger, the following three variables are initialized: Retain Cloud Environment, Retain Cloud Tenant and Retain Cloud Table. The Bearer token is then obtained. The Bearer token is then stored in a variable called BearerToken. In the final step, the POST method of the following API is used to get the records. All the variables that have been stored (Retain Cloud Environment, Retain Cloud Tenant, Retain Cloud Table and BearerToken) are then passed in the body.
The detailed steps are given below:
After ensuring that you have completed the initial set up and after creating a Logic App resource:
- Click Go to resources or find and select your logic app resource by typing the name in the Azure search box
-
Click + blank Logic App
-
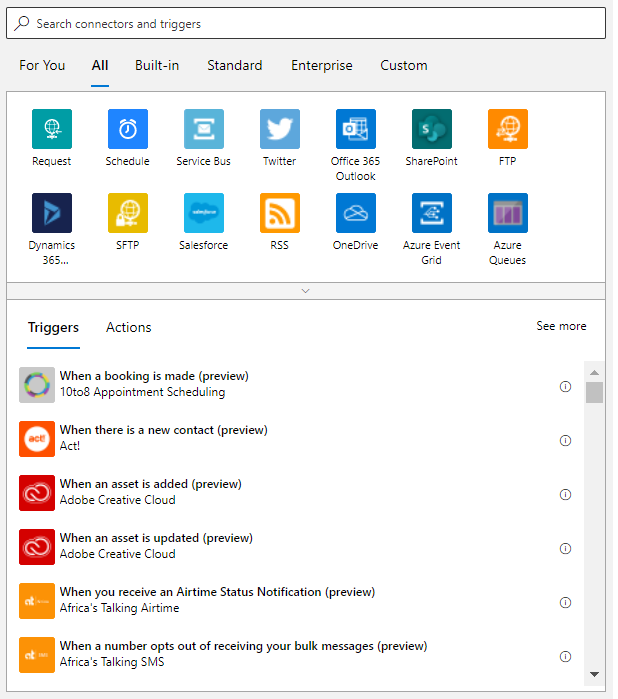
You can now either set up a schedule to run at periodic intervals or a trigger to run when specific events occur
- Select All and then Schedule
-
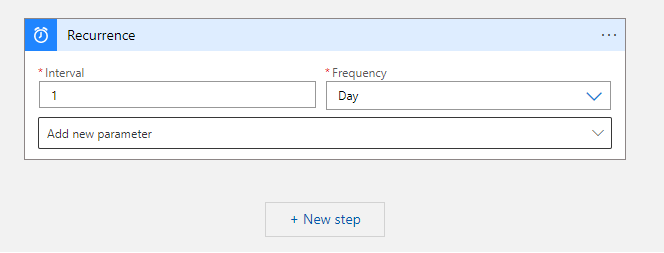
Select Recurrence
-
Enter the Interval and select the Frequency, for example, once every day
-
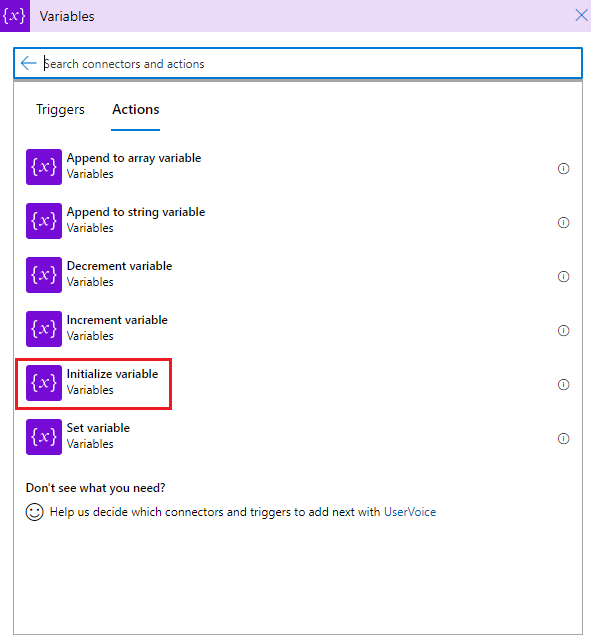
Click New Step and choose an Operation
-
Select Variables and then Initialize variables

-
Enter the values shown above. You may change the title by selecting the 3-dot menu
-
Click +New step

-
Follow the same process to enter values for Retain Cloud Tenant
- Click +New step
-
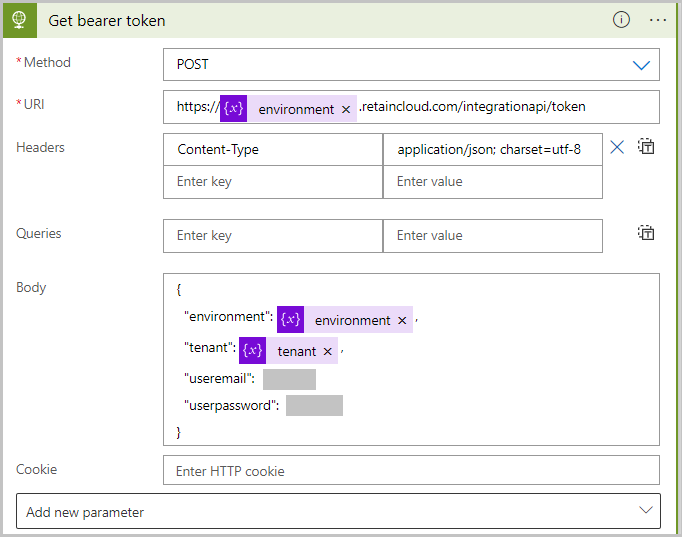
Get bearer token and enter information as shown below; URL should have been provided to you by the delivery team; Content-Type: application/json; charset=utf-8
-
Initialize the bearer token variable and then pass the Body (dynamic content) as the value

-
The final step is to get the records from the Job table
Import data from SQL Server database into Retain
This is a standard logic app which fetches data from SQL Server and transforms and upserts the data into Retain Cloud. The following screenshot shows the high-level example workflow:
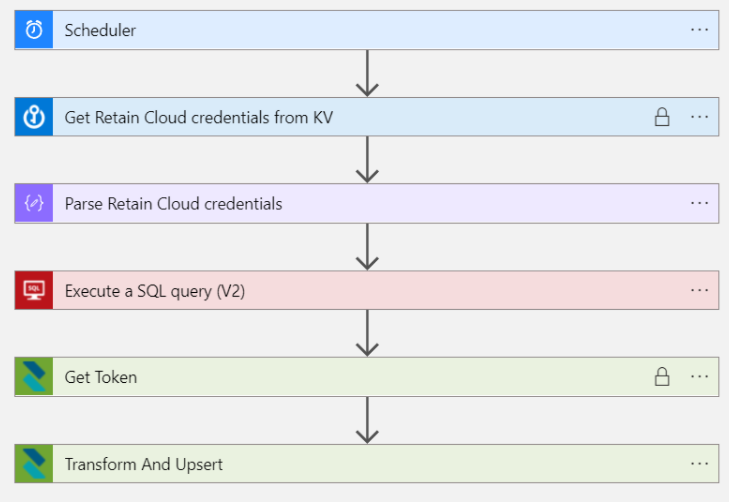
Note: The following example uses Azure Resource Managemener (ARM) templates to help you get set up. If you're using or editing these files, using Visual Studio Code and installing the ARM Tools extension is recommended.
Template to use
In order to import data from a SQL Server database into Retain:
- If you haven't, complete the initial set up
- Deploy the following template:
logic-importsql-template.json (download) template
Parameters
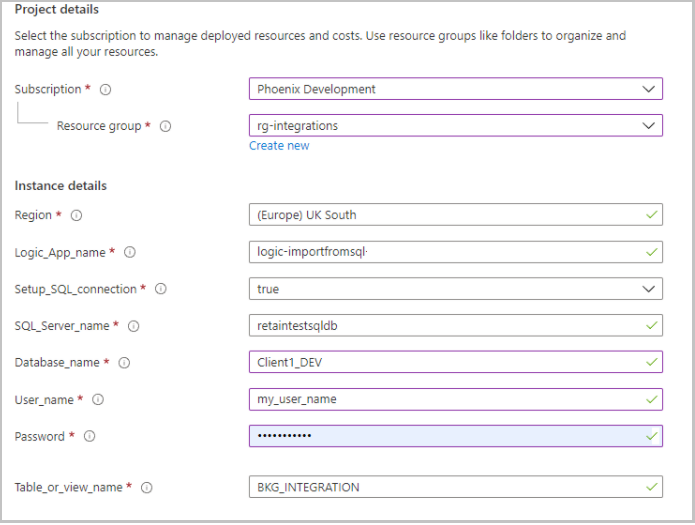
- Region: auto-populated based on the resource group location
- Logic_App_name: name chosen by the user following environment conventions
- Setup_SQL_connection: true/false. If a SQL connection is already set up then a new one is not needed and should be false, otherwise true
- Sql_Server_name, Database_name, User_name and Password: database credentials. Once created, the SQL API Connection credentials can be changed through the Azure portal
- Table_or_view_name: table or view to fetch data from. Can be changed later in the Logic App editor