Understand roles
A Role is an expression of staff requirements. You may choose to create and request roles to compare the costs of upcoming work using existing resources. A role may not always translate into a future booking.
Roles can be accessed via the List view page and can also be configured and viewed on the Planner. However, since Resource managers are often responsible for people and teams rather than jobs, to allow them quick access, Roles can also be accessed directly from the left navigation bar without having to go via Jobs or Plans. In the sections that follow, details of how Roles can be actioned is specified in each of these three ways. Roles can be ungrouped or grouped into scenarios. Roles can be added by name where you simply specify the name of the role or they can be added by criteria.
Types
Roles can be created simply by specifying a name or they can be created by specifying requirements. Roles created by specifying only a name are called roles by name or non-criteria roles. Roles created by specifying requirements are called criteria roles or roles by requirements. Criteria roles may be published to the Roles board to allow professionals to apply to those roles. Also see role categories.
Actors
- Requester: creates or requests a role
- Assigner: assigns a resource to a criteria role (not applicable to role by name)
- Approver: progresses a role to a live booking
Status
A Role can have the following status:
- Draft - Role will default to the Draft status when first created. Only Draft roles can be edited
- Archived - Roles can be archived when no longer required. Archived roles cannot be progressed but can be restarted to return to the Draft state
- Requested - A Draft role sent to an Assigner/Approver by a Requester becomes a Requested role
- Rejected - Requested roles rejected by the Approver
- Live - Draft roles may be Requested and then progress to a live booking (with the status Planned). Live roles may be kept for reference and reporting purposes
The status of a criteria role depends on the status of the resources assigned to the role:
- All assignees have status Requested then role status will be Requested
- All assignees have status Live and FTE/number of resources fulfilled then role status will be Live
- All assignees have status Live but FTE/number of resources not fulfilled then role status will be Requested
- All assignees have status Rejected and FTE/number of resources not fulfilled then role status will be Requested
- Some assignees have status Requested and some Live then role status will be Requested
- Some assignees have status Rejected and some Live then role status will be Requested
- Some assignees have status Requested and some Rejected then role status will be Requested
Progression
A Role progresses as follows. Status is indicated in bold:
- Requester: Creates role → Draft → sends to an approver/assigner → Requested
- Requester: Draft → archives role → Archived
- Requester: Rejected → archives role → Archived
- Requester: Archived → restarts a role → Draft
- Requester: Rejected → restarts a role → Draft
- Approver: Requested → rejects role providing a reason for rejection → Rejected
- Approver: Requested → completes a role → Live (planned booking created)
- Approver: Draft criteria roles role → completes a role → Live (planned booking created)
- Approver: Requested → completes a role → Live (planned booking created)
In addition, for criteria roles:
- Assigner: Requested → rejects role providing a reason for rejection → Rejected
- Assigner: Requested → assigns a resource to the role
See role workflows to define what each actor can do in the role workflow.
Note
Live, Requested and Archived roles cannot be edited
Recognise roles on the planner
Roles can be viewed on the Planner as bars.

Role bars are displayed with the first letter of the role status placed within a circle as a badge on the right side of the bar. If bar is too small, the role status may not be visible. Only draft and requested roles are displayed on the planner. Live roles show as bookings. Roles with other statuses are not displayed.
Criteria based roles are displayed with the following symbol: ![]() .
.
Also see, how criteria roles are displayed on the planner in the job view and how criteria roles are displayed on the planner in the resource view.
How to distinguish between role bars, booking bars and assignee bars

An assignee bar is a criteria role bar with assigned resources. Assignee role bars are always white and never filled in with colour. You cannot apply colour themes to assignee bars. An assignee bar displays the name of the assigned resource. It will also display R (for requested).
See recognise roles on the planner as bars. A role bar displays the text Unassigned, if a resource has not been assigned to the role. Role bar will display Pending, if some resources still need to be assigned in order to meet the time allocation set for the role. You can configure the role bar to display selected fields. You can also apply colour themes to a role bar.
When a role becomes a booking, it will be displayed against the resource/job name with the selected colour theme. You can control the information displayed on a booking bar and select the fields that are displayed.
Recognise the Roles inbox
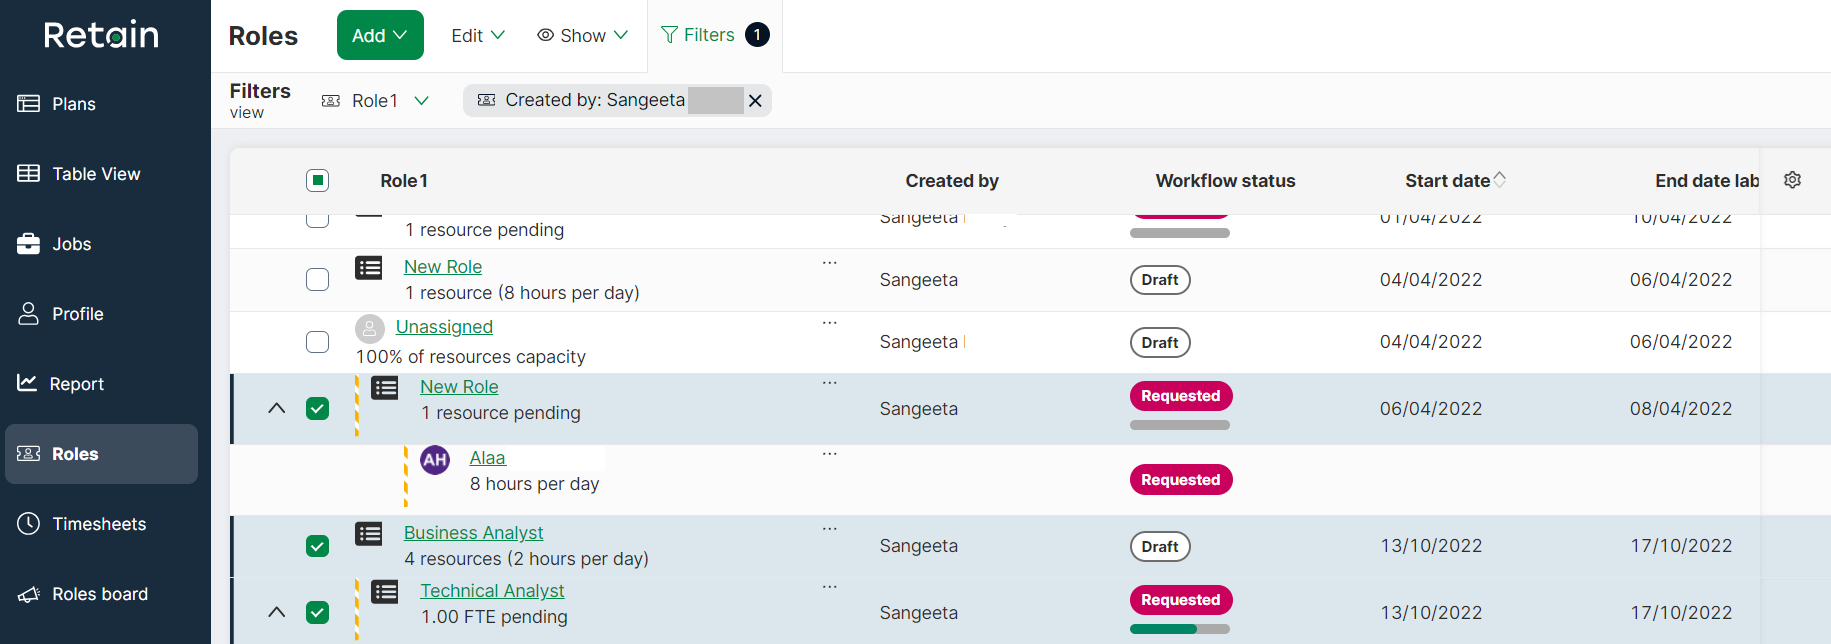
Roles can also be viewed in the Roles Inbox by selecting the Roles option from the left menu.
Recognise the Roles pane
The Roles pane can be accessed in the following ways:
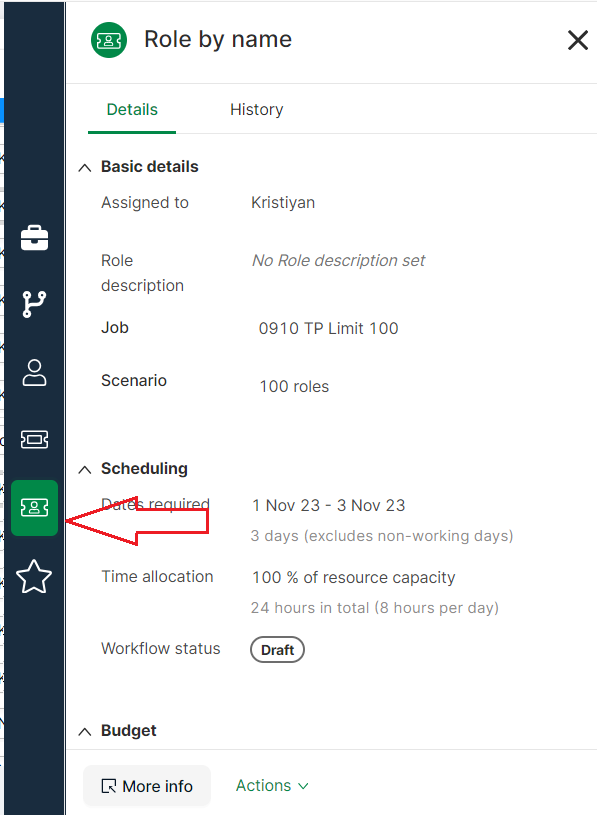
Click a role on the Planner/Roles Inbox to enable the role pane. Click on the role pane. Details of the role will then be displayed in the Role pane.
Scenarios
Roles can either be ungrouped or grouped together in Scenarios. Ungrouped roles allow rapid creation of roles with minimal information. This is useful for organisations that do not have the need to group their demands together.
Scenarios and Roles can be configured in Admin settings such as fields and planning data. You can also set up functional security and field level access. Requesters and Planners have been set up as two different security profiles.
Example
Example
Jasmeen has some upcoming work which may require a booking. If she has a specific resource in mind, then she will create a new role, assign the resource to the role and save it. She now has a draft role with a specific assigned resource. She may archive the role when she no longer needs it. Jasmeen may also create multiple scenarios with multiple roles to compare costs, revenues and profits. This will allow her to progress profitable scenarios to live bookings.
Understand time allocation
Time can be allocated to multiple resources in two ways:
- by the number of FTE (e.g. 2 FTE)
- by the number of resources for a specified number of hours per day (e.g. 3 resources for 7.5 hours per day)
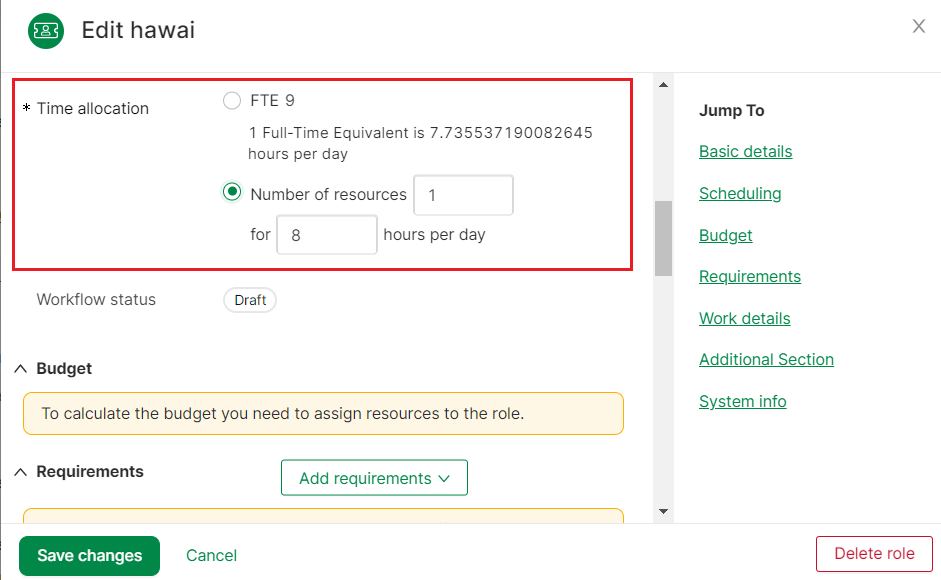
1 Full-Time Equivalent (FTE) value is calculated as follows: {total hours} / {total days} = {hours per day}. In other words, find the Work pattern associated with the FTE reference diary set for the Job, add the Work time for each day type and then divide it by the number of days to get the average total work day hours.
When all assigned resources for a Role are progressed to Live, the workflow status of the criteria role changes to Live. If less than 0.01 FTE is pending on the role, this is ignored and the role is considered Live.
Note
- You cannot enter more than 20 FTE or 20 resources.
- The FTE option always allows partial assignments (e.g. you can enter 0.5 or 0.2 or 0.1 in the FTE field)
- You cannot enter a partial number in Number of resources. The time allocation is the same for all the resources (e.g. 3 resources will be booked for 7.5 hours per day)
Understand budget
Criteria roles contribute to the cost calculations of a scenario only when there is a resource assigned. Until you assign a resource, you can estimate the role budget. This can be done via the Manage Budget screen.
Access the Manage Budget screen
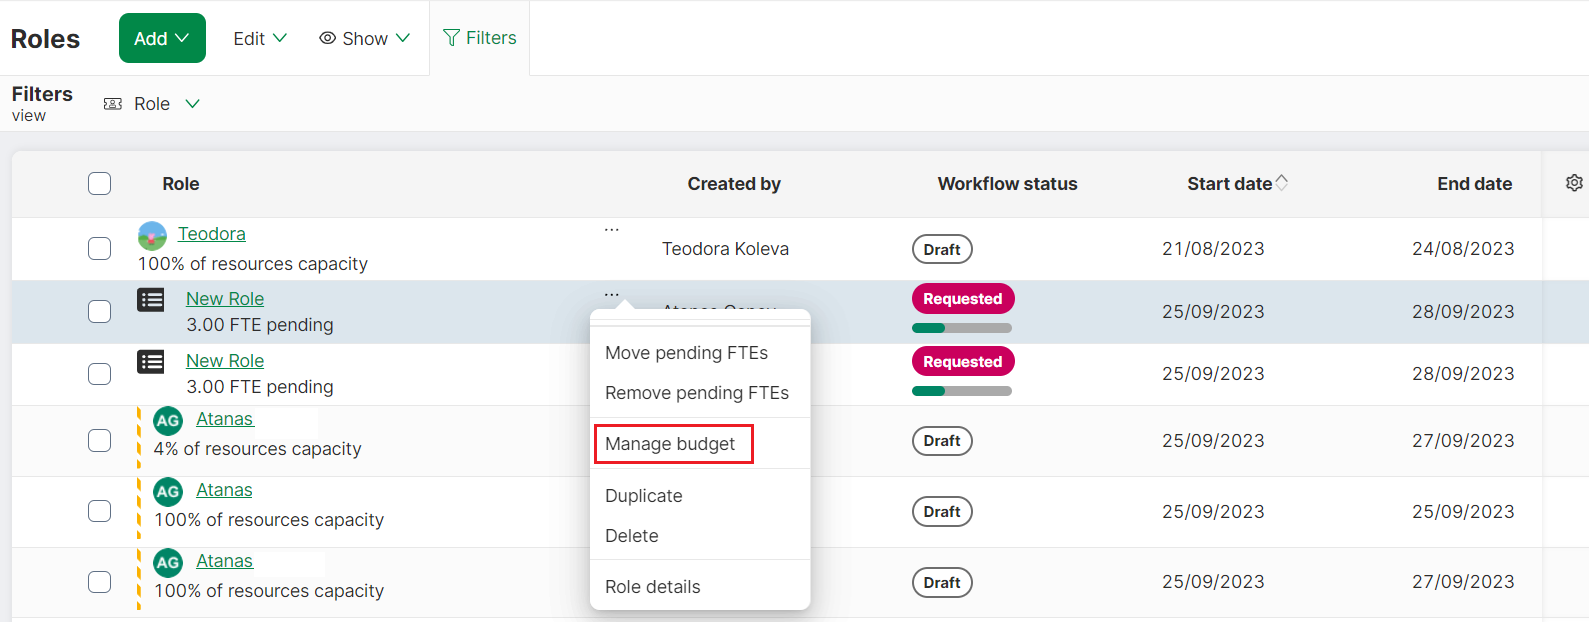
- On the Roles inbox, click the 3-dot menu for a criteria role and select Manage budget (this can also be done by selecting the Actions menu via the Planner)
- The budget section will be displayed
- If resources have not been assigned to the role, you can estimate the role budget or if resources have been assigned, you can apply charge rates to calculate the actual role budget
To estimate the role budget:
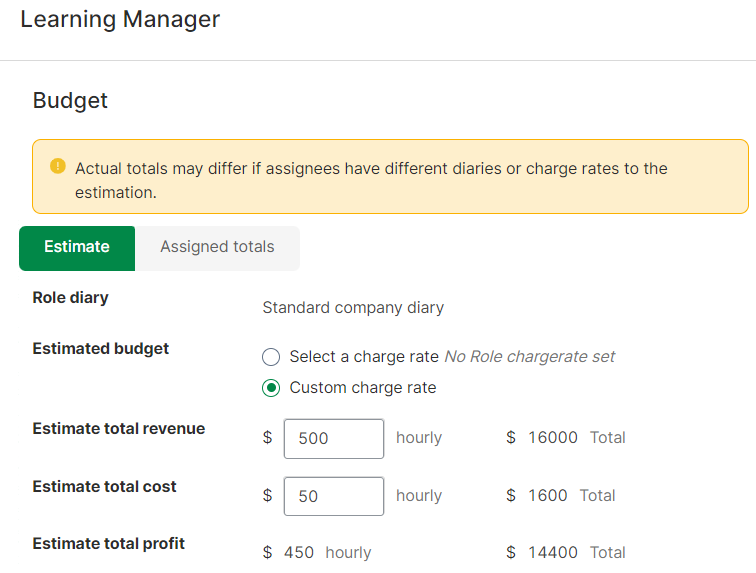
- Select the Estimate tab on the Manage Budget screen (Once you start assigning resources to a role, you can toggle to Assigned totals)
- Either select a charge rate from the dropdown or enter a custom charge rate and enter the values
- The estimated total profit will be displayed
You can group roles into scenarios and compare the estimates of cost, revenue and profits on the scenario comparison page:

If resources have been assigned, select one of the following for every assigned resource, to calculate the budget:
- resource charge rate: this will use the charge rate assigned to the resource when creating or editing the resource
- other charge rate: select the charge rate from the drop down that is displayed when you select this option
- custom charge rate: simply enter the hourly cost and revenue
Note
- If a role is fully staffed, the Assigned totals tab will be opened by default
- The budget section only includes Requested or Live assignees. Rejected assignees are not displayed
- The budget section can only be edited in Draft and Requested state
- If the criteria role is partially live (i.e. it has one or more but not all live assignees) then radio option against the role and the 'Live' assignee will become read-only
Also see:
- understand financial calculations to understand charge rates
- set up charge rates to add/edit/delete charge rates