List view
List view allows you to view, create, and manage data related to Jobs, Resources, and Roles. Create Jobs, Clients, Scenarios and Roles, edit Jobs, Resources and Roles, and filter the data by a range of criteria. It also allows you to save your configuration of the page as a workspace.
Note
List view was formerly known as the Jobs page. To rename the List view page, see Set up the display pages in the left menu.

Use the tabs in the top bar to switch between Jobs view, Resources view, or Roles view.
By default, the grid in each view displays 20 rows per page. Use the pagination buttons to scroll through the data.
Jobs view
When you switch to Jobs view, the grid displays all of your current Jobs. The grid also displays columns including the Project status, Client name, and the start and end dates of the Jobs. Use the settings cog to choose the columns you want to view.
Locate the Job you want and click the ellipsis icon to manage the Job. Use the checkboxes and the Edit action to Bulk edit Jobs.

Resources view
When you switch to Resource view, the grid displays all of your active Resources. The grid also displays columns including the Resource's Job title, Grade, and Charge rate. Use the settings cog to choose the columns you want to view.
Locate the Resource you want and click the ellipsis icon to view their details, navigate to their Profile, or edit the Resource. Use the checkboxes and the Edit action to

Roles view
When you switch to Roles view, the grid displays all of your active Roles. The grid also displays columns including the user the Role was Created by, the Workflow status, and the start and end dates of the Roles. Use the settings cog to choose the columns you want to view.
Note
Enable the Roles view on the List View page in your Security Profile.
Locate the Role you want and click the ellipsis icon to manage the Role's status, duplicate the Role, or view the Role's details.

Workspaces
The List view allows you to configure the visible data, columns, and filters, then save your configuration as a workspace. This allows you to quickly view the data you want to see whenever you navigate back to the List view. Users can create multiple workspaces. Workspaces can be private, so they are only visible to the user who created them, or public, so anyone in your organisation can use them. Public workspaces can be read-only or editable. Users can also make public workspaces private, or make private workspaces public.
Workspaces function in the same way as plans on the Plans page. For more information, see Understand plans.
Bulk edit
List view allows you to edit multiple Jobs, Resources, or Roles simultaneously. This allows you to change the project manager of multiple Jobs, add a Division to multiple Resources, or make multiple Roles live, without manually editing each one individually.
Note
- The maximum number of entities you can bulk edit at once is the number of visible entities on the grid. Use the pagination options to change the number of visible entities on the grid.
- You must have permission to edit entities individually to be able to edit them in bulk.
Bulk edit Jobs
- From the navigation pane, select List view.
- From the top bar, select Jobs. Retain switches to Jobs view.
- Locate the Jobs you want and check the boxes for each one.
-
Click Edit, then click Edit Jobs.
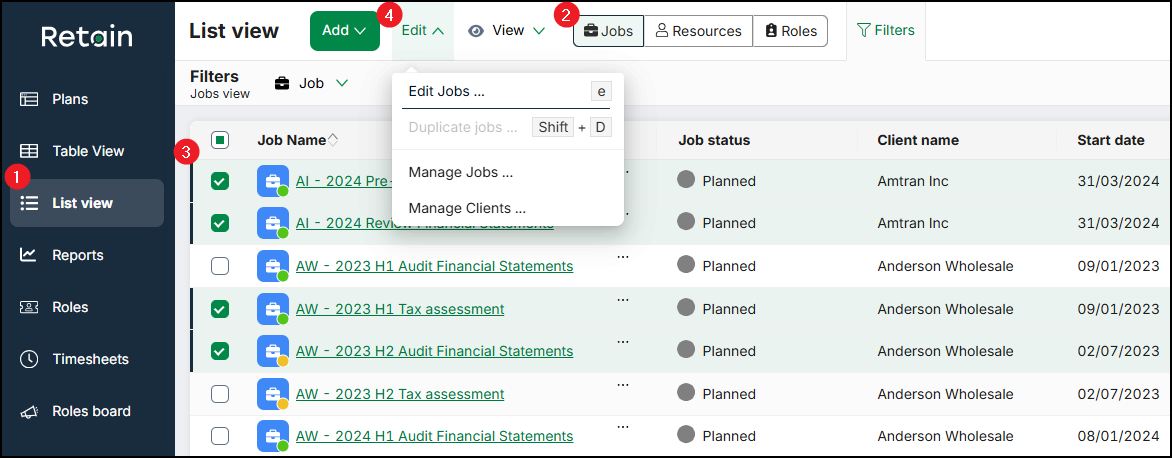
The Edit Jobs form opens. The top of the form displays the number of selected Jobs and the primary details of each one.
-
Select the Fields you want to edit.
- For each field, select the new value you want.
-
Click Save all.
Retain updates the data for all of the selected Jobs.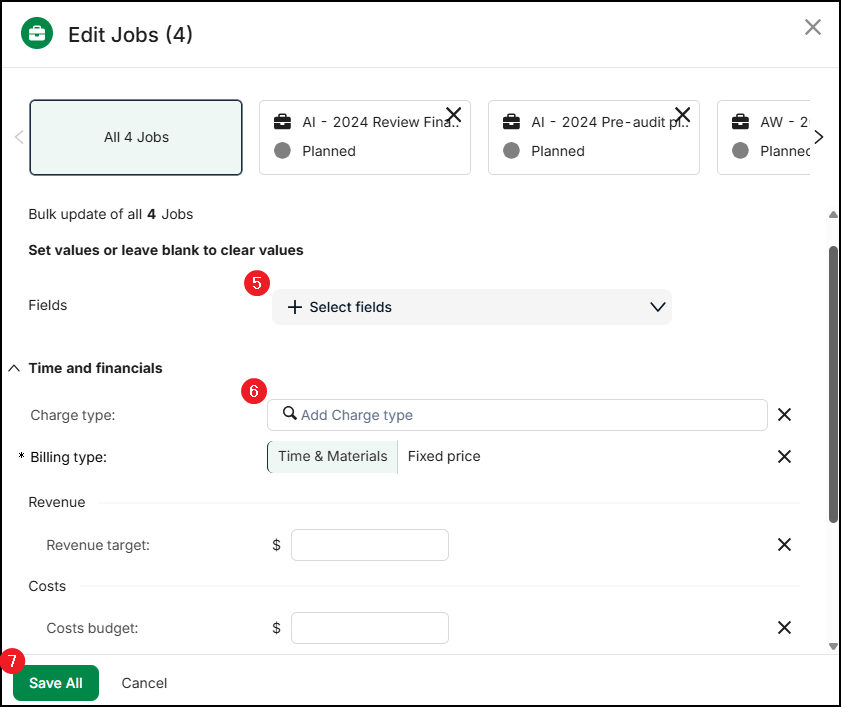
For more information, see Bulk Edit Jobs.
Bulk edit Resources
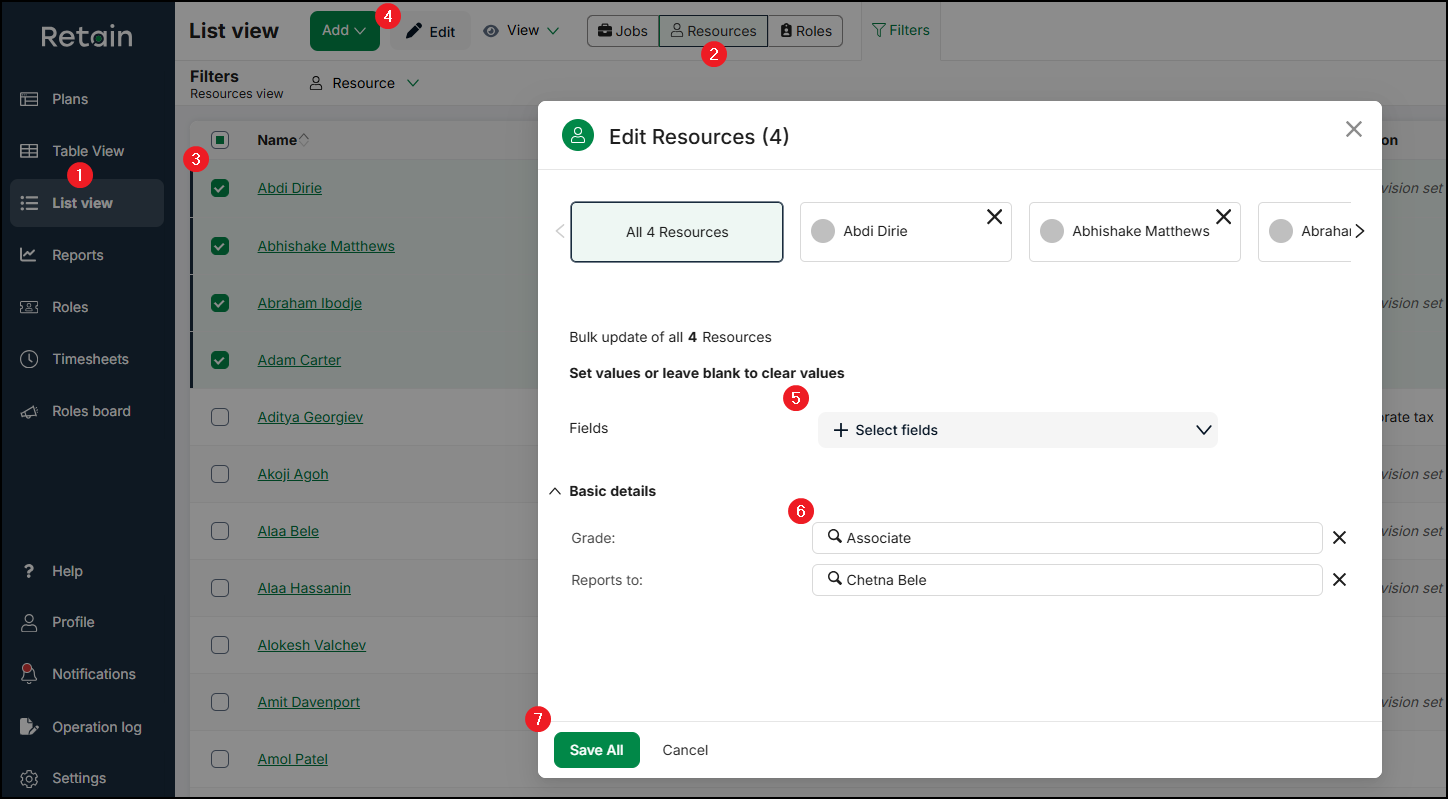
- From the navigation pane, select List view.
- From the top bar, select Resources. Retain switches to Resources view.
- Locate the Resources you want and check the boxes for each one.
- Click Edit.
The Edit Resources form opens. The top of the form displays the number of selected Resources and their names. - Select the Fields you want to edit.
- For each field, select the new value you want.
- Click Save all.
Retain updates the data for all of the selected Resources.
Note
You cannot edit a Resource's Skills using this process.
For more information, see Bulk Edit Resources.
Bulk edit Roles
When you bulk edit Roles, you can only edit either Roles by name or Roles by requirement. You cannot edit Roles by name and Roles by requirement simultaneously.
- From the navigation pane, select List view.
- From the top bar, select Roles. Retain switches to Roles view.
- Locate the Roles you want and check the boxes for each one.
- Click Edit.
-
To edit the selected Roles by name, click Edit Role by name.
To edit the selected Roles by requirement, click Edit Role by requirement.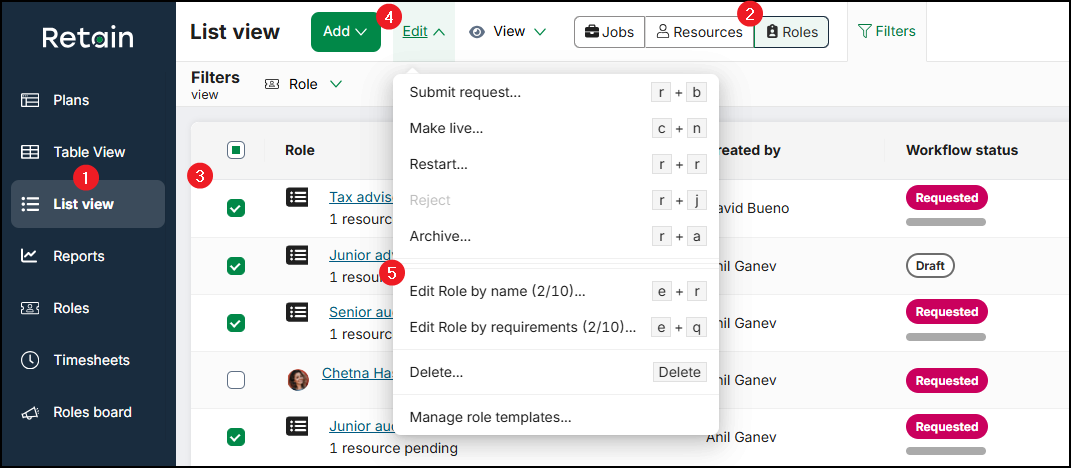
The Edit Roles form opens. The top of the form displays the number of selected Roles, their type, and the primary details of each one.
-
Select the Fields you want to edit.
- For each field, select the new value you want.
-
Click Save all.
Retain updates the data for all of the selected Roles.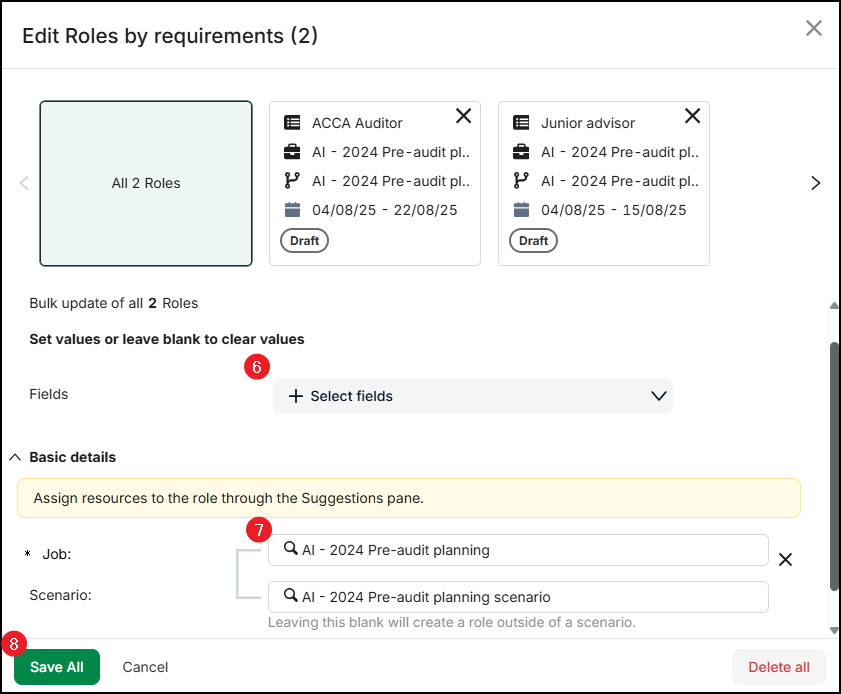
For more information, see Bulk Edit Roles.